When I think back to my childhood in Asheville, North Carolina, I can’t help but smile at the memories of cooking alongside my grandmother, especially when we made Cheesy Thumbprint Appetizers. The kitchen always felt warm and cozy, infused with the inviting aromas of melted cheese and fresh herbs. I remember the first time she instructed me to press my thumb into the dough, creating little wells waiting to be filled with creamy goodness. Each bite was a delightful marriage of flavors that danced on the tongue, leaving us wanting more. Those simple yet vibrant moments of cooking felt like pure magic, a mingling of creativity and tradition wrapped up in a cheesy, buttery hug.
Cheesy Thumbprint Appetizers have become a cherished recipe in my family, perfect for gatherings, celebrations, or just because. They hold a nostalgic value, and each time I serve them, I’m reminded of my grandmother’s laughter and warmth. Whether I’m hosting a picnic or a cozy family dinner, these appetizers always make their way to the table. Let’s dive into the delightful world of Cheesy Thumbprint Appetizers, exploring not just how to make them, but also the stories and memories they can create.
Flavor and Popularity
The Unique Flavor Profile of Cheesy Thumbprint Appetizers
Cheesy Thumbprint Appetizers offer a unique flavor profile, seamlessly balancing richness and freshness. The buttery base melds perfectly with the savory cheese, creating a taste that’s both satisfying and light. I often opt for a combination of sharp cheddar and creamy mozzarella, which blends beautifully to create that irresistible gooeyness. When you add herbs like rosemary or thyme, the earthy notes uplift the cheese, enhancing its natural flavors. Each bite is a delightful explosion of textures and tastes, launching your taste buds on a savory journey.
What truly sets these appetizers apart is their versatility. You can customize the flavors based on the seasons or simply what you have at home. Swap out the cheese for a spicy pepper jack for a kick, or add sautéed mushrooms for an earthier depth. The beauty is in the thumbprint itself—each well can hold a different surprise, inviting creativity into your cooking.
Why This Recipe Is a Family Favorite and Crowd-Pleaser
Cheesy Thumbprint Appetizers have a way of bringing people together. When I set a tray on the table, the anticipation is palpable. Friends and family gather around, excited to see what flavors will unfold, and it’s not long before laughter and chatter fill the room, all fueled by those delightful bites. They evoke a sense of nostalgia, a reminder of family gatherings where everyone shares laughter and stories.
The fondness for these little delights runs deep within my family. My children grew up helping me in the kitchen, pressing their little thumbs into the soft dough and giggling as cheese oozed out during baking. Now, as they prepare their own versions for their friends, I can’t help but feel proud. It’s more than just an appetizer; it’s a flavorful thread that binds generations together.
Ingredients and Preparation
Essential Ingredients and Possible Substitutions
To create mouthwatering Cheesy Thumbprint Appetizers, you’ll want to gather a few essential ingredients:
- All-purpose flour: This forms the base of your thumbprint dough, creating a tender texture.
- Butter: Use unsalted butter for control over the saltiness. This makes the dough buttery and rich.
- Grated cheese: Sharp cheddar is my go-to, but feel free to mix in Parmesan, mozzarella, or any cheese you love.
- Garlic: Fresh minced garlic adds depth and an aromatic kick.
- Fresh herbs: Chopped rosemary or thyme elevate the flavors even further.
- Egg yolk: This will help bind the dough and add richness.
- Sour cream or cream cheese: For a creamy filling that keeps the cheese nice and gooey.
If you need substitutes, don’t fret! Gluten-free flour can work if you are catering to dietary needs. For the cheese, vegan cheese or nutritional yeast can provide a cheesy flavor for plant-based diets. You can also skip the eggs by using a mixture of flaxseed meal and water for binding, making this recipe accessible for everyone.
Step-by-Step Recipe Instructions with Tips
-
Prepare the Dough: In a large bowl, combine the flour and salt. Cut in butter until the mixture resembles coarse crumbs. Stir in the cheese, garlic, and herbs. In a separate bowl, whisk the egg yolk and sour cream together, then fold into the flour mixture until just combined.
-
Chill the Dough: Once combined, wrap the dough in plastic wrap and refrigerate it for about 30 minutes. Chilling helps maintain the shape of your thumbprints during baking.
-
Shape the Appetizers: Preheat your oven to 350°F (175°C). Roll tablespoon-sized balls of dough and place them on a baking sheet lined with parchment paper. Use your thumb to create an indentation in the center of each ball.
-
Fill the Thumbprints: Spoon your cheese mixture into the thumbprints, being generous. I love using a blend of cheeses for rich flavor, but keep it simple or get adventurous with extra ingredients.
-
Bake Until Golden: Bake for 18-20 minutes, or until the edges are golden. The cheese will be bubbly and beautifully melted, exuding an aroma that is sure to draw everyone in.
-
Serve Warm: Allow cooling slightly before serving; they are best enjoyed warm. I love to sprinkle some extra herbs on top for a pop of color and flavor.
Cooking Techniques and Tips
How to Cook Cheesy Thumbprint Appetizers Perfectly
Getting the perfect thumbprint can be a delightful experience. Here are some tips that I’ve collected over the years:
- Keep the dough cold: Don’t skip chilling the dough; it keeps your thumbprints from spreading too much while baking.
- Don’t overcrowd the baking sheet: Give each appetizer room to breathe, as this helps them cook evenly and prevents sticking.
- Experiment with fillings: Consider adding sautéed mushrooms or jalapeños for a kick. Mix it up and find your favorite combination.
Common Mistakes to Avoid
One common mistake people make is not measuring their ingredients accurately. Baking is a precise science, so ensure you have the right balance of flour and butter. Over-filling the thumbprints can also lead to a cheesy overflow—be generous but mindful! Lastly, give them enough time in the oven. Underbaking can leave you with a doughy texture rather than the crispy, golden dough we all love.
Health Benefits and Serving Suggestions
Nutritional Value of Cheesy Thumbprint Appetizers
While these appetizers are rich and cheesy, they can also provide valuable nutrients. The combination of cheese contributes calcium and protein, while the herbs and garlic add antioxidants. You can also utilize whole wheat flour for a slightly healthier twist, increasing the fiber content without sacrificing flavor.
Best Ways to Serve and Pair This Dish
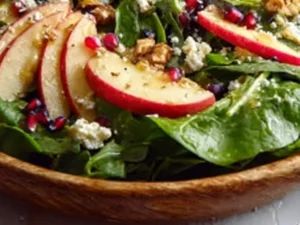
Cheesy Thumbprint Appetizers shine best when served warm, allowing every guest to savor that glorious melt-in-your-mouth experience. Pair them with a fresh salad dressed in vinaigrette to balance the richness, or serve with a selection of dips like marinara or a herby yogurt sauce. They’re perfect for holiday gatherings or as a comforting snack during movie nights.
FAQ Section
What type of mushrooms are best for Cheesy Thumbprint Appetizers?
While this recipe doesn’t necessarily call for mushrooms, if you want to add them, opt for earthy varieties like cremini or shiitake. They offer a robust flavor that complements the cheesy goodness beautifully.
Can I use dried garlic instead of fresh?
You can, but fresh garlic creates a much more vibrant flavor. If you’re in a pinch, use about a teaspoon of garlic powder as a substitute.
How do I store leftover Cheesy Thumbprint Appetizers?
Place any leftovers in an airtight container and refrigerate. They will typically stay fresh for about 3-4 days. Reheat them in the oven or microwave for that freshly baked warm feel.
Can I freeze Cheesy Thumbprint Appetizers?
Yes! They freeze beautifully. Shape and fill the appetizers as you would but freeze them before baking. When you’re ready to enjoy them, bake them directly from the freezer, adding a few extra minutes to the cooking time.
It warms my heart to share this recipe with you, as it’s more than just a collection of ingredients. It’s about family, laughter, and the joy of creating something delightful in the kitchen. If you’re like me and cherish the moments spent cooking for loved ones, I encourage you to try your hand at Cheesy Thumbprint Appetizers. There’s something comforting about that fresh cheese oozing through each bite, reminding us all to savor the moment. Trust me, you’ll want to make this again and again, and with a little sprinkle of love, these appetizers will surely become a staple in your home too.
Print
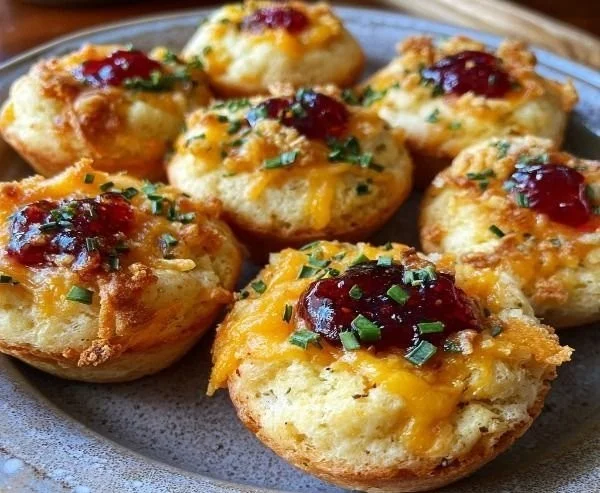
Cheesy Thumbprint Appetizers
Delightful cheesy thumbprint appetizers filled with creamy goodness and fresh herbs, perfect for gatherings and celebrations.
- Total Time: 50 minutes
- Yield: 24 appetizers
Ingredients
- 1 cup all-purpose flour
- 1/2 cup unsalted butter, cold
- 1 cup grated sharp cheddar cheese
- 1/2 cup grated mozzarella cheese
- 2 cloves fresh garlic, minced
- 2 tablespoons fresh rosemary or thyme, chopped
- 1 egg yolk
- 1/4 cup sour cream or cream cheese
Instructions
- Prepare the Dough: In a large bowl, combine the flour and salt. Cut in butter until the mixture resembles coarse crumbs. Stir in the cheese, garlic, and herbs. In a separate bowl, whisk the egg yolk and sour cream together, then fold into the flour mixture until just combined.
- Chill the Dough: Wrap the dough in plastic wrap and refrigerate for about 30 minutes.
- Shape the Appetizers: Preheat your oven to 350°F (175°C). Roll tablespoon-sized balls of dough and place them on a baking sheet lined with parchment paper. Use your thumb to create an indentation in the center of each ball.
- Fill the Thumbprints: Spoon your cheese mixture into the thumbprints generously.
- Bake Until Golden: Bake for 18-20 minutes, or until the edges are golden and the cheese is bubbly.
- Serve Warm: Allow cooling slightly before serving; they are best enjoyed warm.
Notes
Keep the dough cold to prevent spreading while baking. Experiment with various fillings or cheeses for different flavors.
- Prep Time: 30 minutes
- Cook Time: 20 minutes
- Category: Appetizers
- Method: Baking
- Cuisine: American
- Diet: Vegetarian