Red Velvet Whoopie Pies hold a special place in my heart. I’ll never forget the first time I took a bite of one—an explosion of rich chocolate flavor enveloped in that signature red hue, with a creamy filling that practically sang to my soul. It was a crisp fall afternoon, and the air was filled with the scent of woodsmoke and the promise of sweater weather. My dear friend Lucy had invited me over for what she called a “baking marathon,” and I had no idea how transformative that day would become. Together, we donned our aprons, danced around her kitchen filled with laughter, and mixed together the most magical ingredients. The vibrant batter splashed joyfully as we piped it onto baking sheets, its bright color a happy harbinger of the sweet treat to come.
As we poked our fingers into the creamy filling, a swirl of nostalgia washed over me. The warmth of the oven blended seamlessly with the joy of connection and the delicious expectation in the air. When we finally sat down to enjoy our creations, one bite of those warm Red Velvet Whoopie Pies transported me back to simpler times spent in my grandmother’s kitchen, where every recipe was infused with love and laughter. I realized that baking isn’t just about the food; it’s about the memories and stories we create along the way. Now, every time I whip up a batch of Red Velvet Whoopie Pies, I don’t just make a dessert—I share a piece of my heart.
Table of Contents
Flavor and Popularity
The Unique Flavor Profile of Red Velvet Whoopie Pies
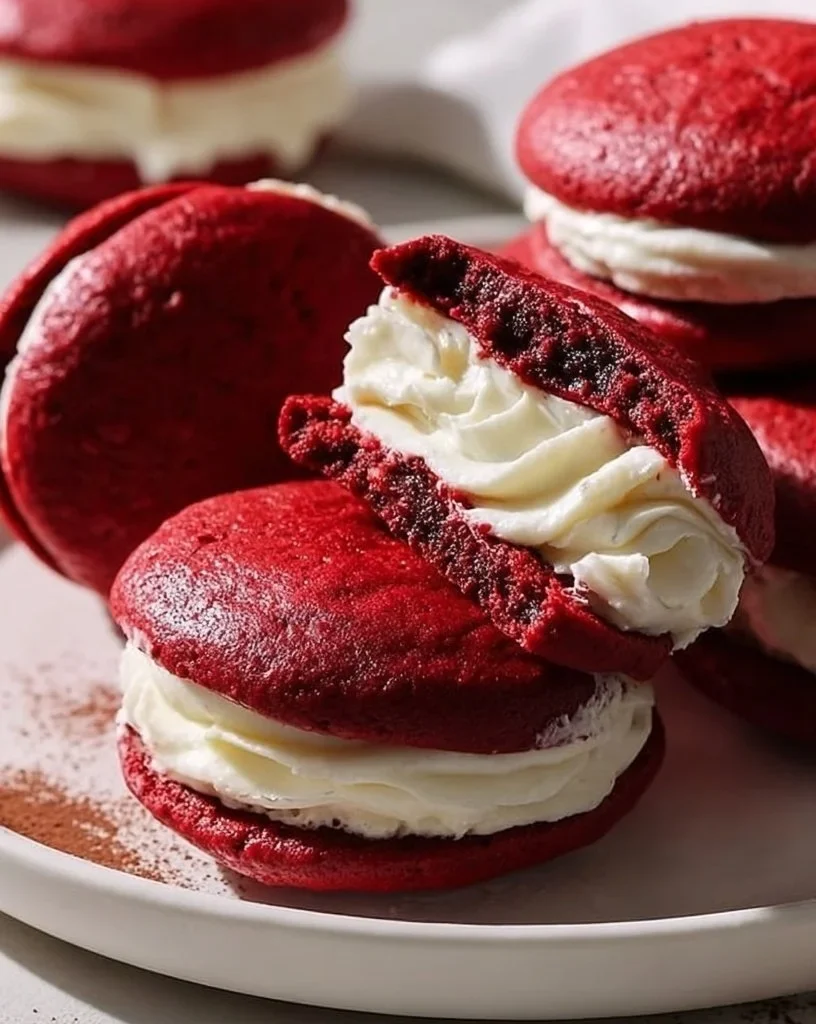
When it comes to desserts, Red Velvet Whoopie Pies stand out like a charming southern belle at a dance. Their distinct flavor is a delightful blend of rich cocoa and buttermilk, which together create a soft, moist cake-like texture. The addition of cream cheese filling elevates these sweet treats to a whole new level, offering a tangy counterbalance to the sweetness of the red velvet. Each bite melds the earthiness of chocolate with a hint of vanilla, leaving you wanting more.
What makes Red Velvet Whoopie Pies truly special is their beautiful color. The bright red exterior draws you in, making them not only delicious but visually stunning. Whether you’re serving them at a birthday party, holiday gathering, or simply savoring a quiet afternoon treat, these pies are sure to be the star of the show.
Why This Recipe Is a Family Favorite and Crowd-Pleaser
Each time I make Red Velvet Whoopie Pies, I can’t help but think about how different generations come together over beloved foods. In my family, these whoopie pies are a staple for special occasions, and I’ve watched my children and grandchildren beam with joy as they take their first bite. The rich flavor pleases even the pickiest eaters, making them a sure-fire hit at my gatherings, whether it’s a potluck or just an afternoon with loved ones.
The beauty of Red Velvet Whoopie Pies lies not just in their taste but in the experience of sharing them. From the laughter-filled minutes spent in the kitchen to the delighted squeals of guests enjoying dessert, these pies embody the joy of connection. When I see my family savoring each sumptuous bite, I am reminded that food is a powerful storyteller, linking us to our past and creating new memories in the process.
Ingredients and Preparation
Essential Ingredients and Possible Substitutions
To make scrumptious Red Velvet Whoopie Pies, you’ll want to gather the following essential ingredients:
- All-purpose flour: The foundation for the cake-like texture.
- Cocoa powder: A high-quality unsweetened cocoa gives depth to the flavor.
- Baking soda & baking powder: These friends help achieve that perfect soft rise.
- Salt: Just a pinch enhances all the flavors.
- Granulated sugar: Sweetness is key, so don’t skimp here.
- Eggs: These add moisture and richness.
- Buttermilk: A key ingredient that gives the cakes a wonderful texture.
- Vegetable oil: Keeping the cakes moist and tender.
- Vanilla extract: For that warm and inviting flavor.
- Red food coloring: To achieve that iconic hue.
- Cream cheese: The star of the filling, bringing tang and creaminess.
- Powdered sugar: For sweetness and texture of the filling.
If you’re looking for possible substitutions, don’t fret! If you don’t have buttermilk, simply mix one cup of milk with a tablespoon of vinegar or lemon juice and let it sit for 5-10 minutes. You can also replace vegetable oil with melted coconut oil for a hint of tropical flavor. For those avoiding gluten, feel free to use a one-to-one gluten-free flour blend; just make sure it contains xanthan gum for structure.
Step-by-Step Recipe Instructions with Tips
To create your Red Velvet Whoopie Pies, follow these simple steps:
Prep Your Oven: Preheat your oven to 350°F (175°C) and line two baking sheets with parchment paper.
Mix Dry Ingredients: In a large bowl, whisk together the flour, cocoa powder, baking soda, baking powder, and salt until well-combined.
Combine Wet Ingredients: In another bowl, mix the sugar and vegetable oil until smooth. Add the eggs one at a time, followed by the buttermilk and vanilla extract. Stir in the red food coloring until the mixture is vibrant and uniform.
Blend It All: Gradually add the dry ingredients to the wet mixture, stirring until just combined. Be careful not to overmix—this helps keep your whoopie pies light and fluffy.
Pipe the Batter: Using a piping bag or a spoon, dollop tablespoon-sized amounts of batter onto the prepared sheets, leaving space for them to spread while baking.
Bake: Place the baking sheets in the oven and bake for about 10-12 minutes, or until the cakes spring back lightly when touched. Let them cool completely on a wire rack.
Prepare the Cream Cheese Filling: While your cakes cool, beat together cream cheese and powdered sugar until fluffy and smooth.
Assemble the Pies: Once the cakes are cool, spread a generous dollop of the cream cheese filling on the flat side of one cake and top it with another cake. Press gently to hold them together.
Enjoy and Share: Dig in! These pies are best enjoyed with family and friends—just like my grandmother used to say, good food is made for sharing.
Cooking Techniques and Tips
How to Cook Red Velvet Whoopie Pies Perfectly
When preparing these delicious treats, there are a few key techniques that will help you achieve the best results. First, ensure your ingredients are at room temperature; this helps them blend more easily and yields a tender cake. Make sure to sift your dry ingredients together to eliminate any lumps and to ensure even mixing.
When piping the batter, controlling the size is essential; you want them to be uniform for even baking. If a piping bag feels overwhelming, a simple spoon can work just as well—just aim for a consistent dollop size.
Another trick is to slightly underbake your whoopie pies for extra moisture. They’ll continue to cook as they cool on the baking rack, resulting in a delightfully soft center.
Common Mistakes to Avoid
When baking Red Velvet Whoopie Pies, there are a few pitfalls to be aware of. First, avoid overmixing the batter, as it can lead to dense results. Remember that a few lumps in the batter are okay!
Another common mistake is not allowing the cakes to cool completely before assembling. If they’re even slightly warm, the cream cheese filling can melt and make a mess—though a delicious mess! Patience, my friends, is key.
Be cautious with the red food coloring; start small. You can always add more if you want a deeper shade. A vibrant hue makes these whoopie pies visually stunning, so don’t shy away!
Health Benefits and Serving Suggestions
Nutritional Value of Red Velvet Whoopie Pies
While Red Velvet Whoopie Pies are certainly a treat, it’s also worth noting they contain ingredients that offer some nutritional benefits when enjoyed in moderation. The cocoa brings antioxidants to the mix, and the cream cheese adds some protein and calcium. Baking with high-quality ingredients can also elevate the health factor a notch higher.
While these pies are a dessert through and through, they can be better than many store-bought options, using real ingredients and love instead of preservatives.
Best Ways to Serve and Pair This Dish
Red Velvet Whoopie Pies are delightful on their own, but why not elevate the experience? Pair them with a mug of hot cocoa or a frothy cappuccino for a cozy afternoon treat. They also work wonderfully alongside a scoop of vanilla ice cream for a spectacular dessert presentation.
Don’t forget about serving them on a decorative platter or with a sprinkle of powdered sugar on top to elevate their appearance. Plus, sharing these beauties at gatherings can lead to endless smiles and compliments!
FAQ Section
What type of mushrooms are best for Red Velvet Whoopie Pies?
Though mushrooms might not be a traditional component of Red Velvet Whoopie Pies, some adventurous bakers have experimented with incorporating mushroom flour for unique flavor twists. However, to maintain the classic taste, it’s best to stick with the original ingredients outlined in this recipe.
Can I use dried garlic instead of fresh?
Dried garlic is not typically used in Red Velvet Whoopie Pies, as the recipe focuses on sweet flavors. However, if you’re curious about savory whoopie pies, using dried garlic might bring an exciting twist to a different kind of filling!
How do I store leftover Red Velvet Whoopie Pies?
To keep your Red Velvet Whoopie Pies fresh, store them in an airtight container at room temperature for up to two days. For longer storage, keep them in the refrigerator for up to a week. Just make sure to separate layers with parchment paper to prevent sticking.
Can I freeze Red Velvet Whoopie Pies?
Absolutely! These delightful treats freeze beautifully. Arrange your whoopie pies in a single layer on a baking sheet to freeze for about an hour, then transfer them to a freezer-safe bag or container. They can last frozen for up to three months. Just thaw them in the refrigerator for a few hours before enjoying!
In conclusion, I invite you to dive into the world of baking Red Velvet Whoopie Pies. If you’re like me, finding joy in the kitchen and creating delicious memories is what it’s all about. There’s something comforting about sharing these vibrant treats with loved ones, sparking joy with every bite. Trust me, you’ll want to make this again and again, as each pie brings back cherished memories while creating new ones. Happy baking!
Print
Red Velvet Whoopie Pies
Deliciously rich and vibrant Red Velvet Whoopie Pies filled with creamy tangy cream cheese filling, perfect for sharing with family and friends.
- Total Time: 27 minutes
- Yield: 12 servings
Ingredients
- 2 cups all-purpose flour
- 1/2 cup unsweetened cocoa powder
- 1 tsp baking soda
- 1 tsp baking powder
- 1/4 tsp salt
- 1 cup granulated sugar
- 1/2 cup vegetable oil
- 2 large eggs
- 1 cup buttermilk
- 2 tsp vanilla extract
- 1 tbsp red food coloring
- 8 oz cream cheese
- 2 cups powdered sugar
Instructions
- Preheat your oven to 350°F (175°C) and line two baking sheets with parchment paper.
- In a large bowl, whisk together the flour, cocoa powder, baking soda, baking powder, and salt until well-combined.
- In another bowl, mix the sugar and vegetable oil until smooth. Add eggs one at a time, followed by buttermilk and vanilla extract. Stir in red food coloring until vibrant.
- Gradually add dry ingredients to wet mixture, stirring until just combined.
- Using a piping bag or spoon, dollop tablespoon-sized amounts of batter onto the prepared sheets, leaving space for them to spread.
- Bake for about 10-12 minutes, or until the cakes spring back lightly when touched. Let cool completely on a wire rack.
- In a bowl, beat cream cheese and powdered sugar until fluffy and smooth.
- Once cakes are cool, spread a dollop of cream cheese filling on the flat side of one cake and top with another cake.
- Enjoy and share with loved ones.
Notes
Tips for best results: Use room temperature ingredients, avoid overmixing, and ensure cakes are completely cool before filling.
- Prep Time: 15 minutes
- Cook Time: 12 minutes
- Category: Dessert
- Method: Baking
- Cuisine: American
- Diet: Vegetarian