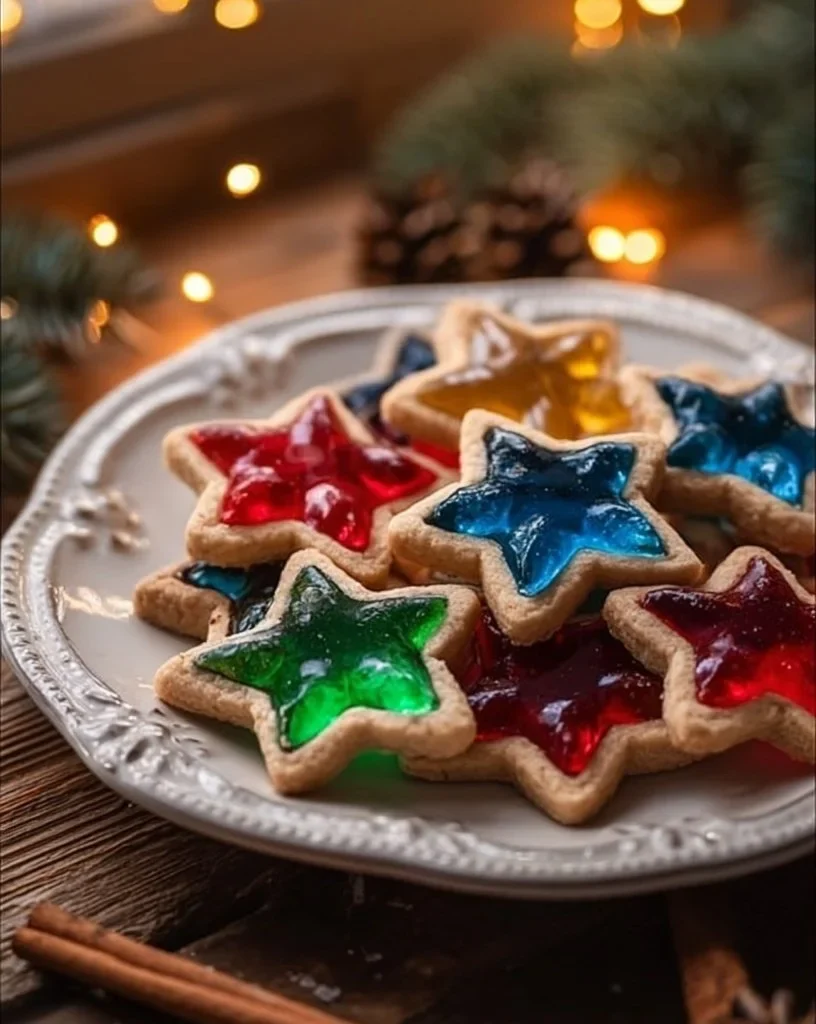
There’s something so magical about Stained Glass Cookies that instantly transports me back to my childhood kitchen, a luminescent world of colors and sweet smiles. I remember the first time I popped them out of the oven: the kitchen filled with the warm, sugary scent of buttery dough as they twinkled like little stained glass windows, brightening up everything around them. My grandmother, with her welcoming laughter and flour-dusted apron, stood by my side, guiding my inexperienced hands. She showed me how to carefully cut out the centers, like crafting tiny works of art, and fill them with colorful bits of crushed hard candies that would melt into brilliant hues against the cookie backdrop. Each bite was an explosion of sweetness and nostalgia, blending the rich traditions of Southern baking with a splash of whimsy that always felt wonderfully playful.
As I created those Stained Glass Cookies for the first time, I felt a rush of joy — not just from the cookies themselves but from the connection I shared with my grandmother. Those moments of laughter and love linger in my heart like a cherished recipe handed down through generations. Now, I carry on that tradition, making these stunning cookies not just for holidays but to share happiness with family and friends. They never fail to brighten up any gathering, and trust me, once you serve these dazzling treats, you’ll find yourself wanting to recreate that magic again and again.
Flavor and Popularity
The Unique Flavor Profile of Stained Glass Cookies
What I adore most about Stained Glass Cookies is how they surprise and delight your taste buds. On the outside, you have a beautifully buttery cookie that whispers sweet promises of vanilla and sugar. The texture is soft yet slightly crisp around the edges, giving you that satisfying crunch with every bite. Then you encounter the center—a mosaic of melted candies that adds an explosion of sweetness, while the variations in flavor from the different colors create a symphony of taste.
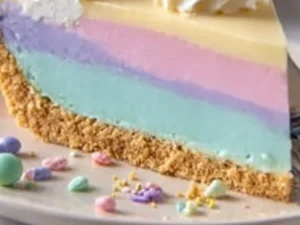
With flavors ranging from tart citrus to rich berry notes, these cookies cater to everyone’s palate, making them an instant favorite among both kids and adults. Plus, the way the colors shine through makes them visually stunning—almost too beautiful to eat, but trust me, no one can resist the allure of these sweet jewels.
Why This Recipe Is a Family Favorite and Crowd-Pleaser
Stained Glass Cookies are not just a treat; they’re an experience that brings the whole family together. From the youngest eager to help crush candies to the proud parents decorating, this recipe fosters connection. Even my friends, who claim to be baking-phobes, can’t resist joining in on the fun. They happily roll and cut while I guide the way, sharing stories and laughter that fill the kitchen.
For holidays, these cookies instantly become a highlight on the dessert table. The vibrant colors cheer up the winter blues and create lasting memories as they are enjoyed year after year. Honestly, you’d be hard-pressed to find someone unwilling to indulge in a cookie that looks like it belongs in a fairy tale! They’re perfect for any occasion—birthdays, festive gatherings, or simply because you want to create a little joy.
Ingredients and Preparation
Essential Ingredients and Possible Substitutions
To make Stained Glass Cookies, gather some easy-to-find ingredients. Here’s what you’ll need:
- Butter: Starting with unsalted butter is key to controlling the saltiness. You could use margarine in a pinch, but you’ll miss that rich flavor.
- Sugar: Regular granulated sugar creates the perfect sweetness that balances with the sugary candies.
- Eggs: Large eggs bind everything together and add moisture.
- Vanilla extract: For a lovely depth of flavor. Almond extract works too if you want to experiment with a different undertone.
- Flour: All-purpose flour provides structure, while a bit of cornstarch makes the cookies soft.
- Hard candies: This is the star of the show! Use a mix of colors and flavors for visual appeal and taste. Feel free to swap in gummy candies for a twist, but note that they won’t create the same stained glass effect.
Step-by-Step Recipe Instructions with Tips
Making Stained Glass Cookies is simpler than you might think! Follow these steps to get that perfect batch:
-
Prep your oven and baking sheets: Start by preheating your oven to 350°F (175°C). Line your baking sheets with parchment paper; this will ensure the cookies don’t stick.
-
Make the dough: In a large bowl, cream together 1 cup of softened butter and 1 cup of granulated sugar until light and fluffy. This usually takes about 3-5 minutes. Add in 1 large egg and a teaspoon of vanilla extract, mixing until combined.
-
Combine the dry ingredients: In a separate bowl, whisk together 2 ¾ cups of all-purpose flour and a pinch of salt. Gradually incorporate this flour mixture into the butter mixture, mixing until the dough comes together. It should be soft but manageable.
-
Chill the dough: Cover the bowl with plastic wrap and refrigerate for at least 30 minutes. This will keep the cookies from spreading too much in the oven.
-
Roll and cut: On a floured surface, roll out the dough to about ¼ inch thick. Use cookie cutters to create shapes and cut out the center of each cookie using a smaller cutter or the back of a piping tip.
-
Add the candy: Crush your hard candies into small pieces and place a few in the center of each cut-out cookie. Don’t be too shy with it; a good heap will create that dazzling stained-glass effect!
-
Bake: Place your cookies in the oven and bake for about 8-10 minutes, or until the edges are slightly golden brown. The melted candies will bubble in the center—this is exactly what you want!
-
Cool and enjoy: Let them cool on the baking sheet for a few minutes before transferring them to a wire rack. Once cooled, you can decorate with icing or enjoy them just as they are.
Cooking Techniques and Tips
How to Cook Stained Glass Cookies Perfectly
One of the most crucial steps is ensuring your butter is softened but not melted. This allows for proper creaming with sugar, leading to the right texture. Be gentle when rolling out the dough—you want it to maintain the chill during this step to achieve that perfect shape. Always keep an eye on the cookies while baking as ovens can vary; the goal is evenly cooked dough with that lovely glassy center.
Common Mistakes to Avoid
One common pitfall is overcooking the cookies. While browning is good, burnt edges signal that your beautiful cookies are ruined. Also, don’t skimp on cooling time! They may seem firm, but cookies need to set before moving them. Misjudging the quantity of crushed candy can also lead to a melty mess instead of a beautiful window.
Health Benefits and Serving Suggestions
Nutritional Value of Stained Glass Cookies
While these cookies are certainly a sweet treat, they do contain key ingredients that offer some perks. Butter provides essential fats, while eggs are packed with protein. The hard candies do contribute sugar, so enjoying these beauties in moderation keeps the balance right. Plus, you can easily boost health by choosing natural colors and flavors when selecting your candies.
Best Ways to Serve and Pair This Dish
Stained Glass Cookies shine as a stand-alone treat, but they can be paired beautifully with a cup of hot tea or a glass of cold milk. For special occasions, I love to serve them alongside fruit platters or during a family movie night to add even more color and fun to the occasion. You can also create themed cookie boxes for holidays, making them a delightful gift for loved ones!
FAQ Section
What type of candies are best for Stained Glass Cookies?
The best candies for these cookies are hard candies like Jolly Ranchers or Life Savers. They melt down beautifully to create that signature stained glass effect. You can mix different colors and flavors for a more festive look!
Can I use dried garlic instead of fresh?
While this isn’t a direct substitution for the cookie recipe, if you want to try including gourmet herbs in your cookies, fresh herbs will provide a more robust flavor than dried. However, in the context of Stained Glass Cookies, fresh vanilla or citrus zest would enhance the flavors much better.
How do I store leftover Stained Glass Cookies?
To keep them fresh, store the cookies in an airtight container at room temperature. They’ll last for about a week, though I can’t guarantee they’ll last that long given how delightful they are!
Can I freeze Stained Glass Cookies?
Absolutely! These cookies freeze beautifully. Just ensure they are completely cooled and layered between parchment paper in an airtight container. They can last in the freezer for up to three months. Just let them thaw at room temperature before enjoying.
Conclusion
If you’re like me and cherish the joy that baking brings, making Stained Glass Cookies is a great way to create lasting memories in the kitchen. There’s something comforting about gathering loved ones to help with the process, sharing sweet moments that stretch beyond the oven. Trust me, you’ll want to make this recipe again and again, as each batch tells its own story of joy and creativity. So roll up those sleeves and let’s make some magic together!
Print
Stained Glass Cookies
Magical Stained Glass Cookies filled with colorful melted candies that bring joy to any gathering.
- Total Time: 40 minutes
- Yield: 24 cookies
Ingredients
- 1 cup unsalted butter, softened
- 1 cup granulated sugar
- 1 large egg
- 1 teaspoon vanilla extract
- 2 ¾ cups all-purpose flour
- 1 pinch of salt
- Colored hard candies, crushed
Instructions
- Preheat your oven to 350°F (175°C) and line baking sheets with parchment paper.
- Cream together the softened butter and sugar until light and fluffy, about 3-5 minutes.
- Add the egg and vanilla extract, mixing until combined.
- In a separate bowl, whisk together flour and salt. Gradually incorporate this into the butter mixture until the dough is soft but manageable.
- Cover the dough and refrigerate for at least 30 minutes.
- Roll out the dough to about ¼ inch thick, and cut shapes with cookie cutters, cutting out the centers with a smaller cutter.
- Place crushed candies in the center of each cut-out cookie.
- Bake for 8-10 minutes or until the edges are slightly golden brown.
- Let cookies cool on the baking sheet before transferring them to a wire rack.
Notes
Ensure your butter is softened but not melted for the right texture. Don’t skimp on cooling time after baking.
- Prep Time: 30 minutes
- Cook Time: 10 minutes
- Category: Dessert
- Method: Baking
- Cuisine: American
- Diet: Vegetarian