There’s a certain magic in celebrating love with something sweet, isn’t there? I remember the first time I decided to make a Mini Valentine’s Day Cake for my husband, Tom. The living room was filled with the sweet aroma of vanilla and chocolate, a warm hug of scents that swirled around as I whisked flour and sugar together. I thought back to the time when my grandmother would bake her special cakes, always carefully showing me the ropes. It was a dance we performed with the ingredients, a conversation between us and the batter. Those moments were so precious, and I wanted to recreate that joy for Tom.
As I slid the tiny cake into the oven, I felt a thrill in my heart. I envisioned his face lighting up with delight, the way love can be reflected in something as simple as a dessert. As I waited, I drizzled some homemade berry sauce on the side, thinking how a touch of sweetness could deepen the flavor of love. When the timer went off, I took out my creation, perfectly puffed and just the right shade of golden. In that moment, my kitchen transformed into a celebration of our love, bringing forth the warmth and happiness that only a Mini Valentine’s Day Cake could inspire.
Flavor and Popularity
The Unique Flavor Profile of Mini Valentine’s Day Cake
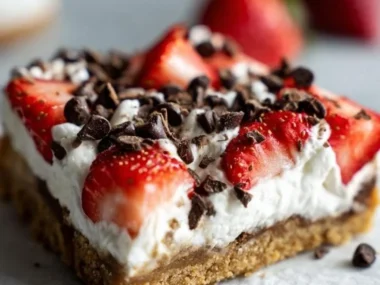
A Mini Valentine’s Day Cake is not just a dessert; it is a delightful representation of affection and creativity. The moment you take a bite, you are greeted with a burst of flavors that dance on your palate. The tender crumb, fluffy and light, perfectly complements the rich, buttery frosting that coats its surface. The subtle hints of vanilla weave through the chocolate richness, making each mouthful a harmonious blend of contrasting yet complementary notes.
The beauty of this cake is how versatile its flavor can be. You can personalize it with your favorite extracts—think almond for a nutty twist or even a dash of espresso powder to deepen the chocolate. Adding layers of fresh berries or a hint of tangy lemon zest can elevate this cake to a new level. Imagine biting into the softness of that cake, followed by the burst of fresh fruit—heavenly! This cake is bound to be a favorite, whether you’re celebrating Valentine’s Day or just looking for an excuse to indulge.
Why This Recipe Is a Family Favorite and Crowd-Pleaser
Each year, I find myself joyfully making this Mini Valentine’s Day Cake for our family gatherings, turning them into love-filled celebrations. It has become a tradition that everyone looks forward to, and I love hearing the excitement in my kids’ voices when they first spot it on the dessert table. There’s something utterly charming about a small cake that brings people together—its size is just right for sharing, yet every slice feels special.
Family and friends often marvel at how something so petite can carry such enormous flavor. They never fail to ask for the recipe, sparking conversations that lead to sharing our favorite memories around the table. The cake holds an important place in our hearts; it becomes not just dessert, but a vessel for the love and laughter we share as we enjoy it together.
Ingredients and Preparation
Essential Ingredients and Possible Substitutions
To create a delicious mini cake, you’ll want to gather the following essential ingredients. Here’s what you’ll need:
- All-purpose flour: The base of your cake—be sure to sift it for lightness.
- Granulated sugar: Adds sweetness; you can use brown sugar for a richer flavor.
- Unsalted butter: This gives a creamy texture. If you prefer, substitute with coconut oil for a dairy-free option.
- Eggs: Essential for binding; try using flax eggs for a vegan alternative.
- Baking powder: This helps your cake rise beautifully.
- Milk: Whole milk works best, but almond or oat milk is a great dairy-free substitute.
- Vanilla extract: Use pure vanilla for that lovely aromatic flavor or almond extract for a twist.
- Cocoa powder: Choose Dutch-processed for a rich chocolate taste; carob powder can be an alternative for a caffeine-free version.
Step-by-Step Recipe Instructions with Tips
Creating the Mini Valentine’s Day Cake is easier than you might think! Here’s how to do it:
- Preheat your oven: Start by preheating your oven to 350°F (175°C). This ensures even baking.
- Prepare your pans: Grease and flour two small round cake pans, or line them with parchment paper. This little step makes removing the cakes a breeze.
- Mix the dry ingredients: In a bowl, sift together flour, cocoa powder, baking powder, and a pinch of salt. This helps aerate the mixture, creating a light cake.
- Cream the butter and sugar: In a separate bowl, cream together the butter and sugar until pale and fluffy—a good 3-5 minutes.
- Add eggs and vanilla: Beat in the eggs, one at a time, followed by the vanilla extract. The mixture should be smooth and glossy.
- Combine wet and dry ingredients: Gradually add the dry ingredient mix to the creamed mixture, alternating with the milk. Finish with a gentle fold to avoid deflating the batter.
- Bake: Divide the batter equally between the prepared pans and bake for 25-30 minutes, or until a toothpick inserted in the center comes out clean.
- Cool: Allow the cakes to cool in the pans for 10 minutes before transferring them to a wire rack to cool completely.
- Frosting: While the cake cools, whip up some light buttercream or cream cheese frosting. Feel free to add flavors like raspberry or lemon to match your cake.
- Assemble: Once cool, place one layer on a serving plate, spread frosting generously, then top with the second layer and frost the top and sides. Decorate with fresh fruits or edible flowers for that extra touch!
Cooking Techniques and Tips
How to Cook Mini Valentine’s Day Cake Perfectly
Perfecting your Mini Valentine’s Day Cake comes down to a few key techniques:
- Room Temperature Ingredients: Ensure your butter, eggs, and milk are at room temperature for better incorporation, resulting in a smooth batter.
- Don’t Overmix: Once you combine the dry and wet ingredients, mix gently. This keeps your cake light and airy.
- Check for Doneness: Baking times can vary; always use a toothpick to check if the center is done. You want a few crumbs to stick without wet batter.
Common Mistakes to Avoid
Even the best of us can make mistakes in the kitchen. Here’s how to avoid some common pitfalls when making your cake:
- Skipping the Sifting: Always sift your flour and cocoa. This makes a huge difference in texture!
- Not Measuring Properly: Baking is a science; use specific measurements for best results.
- Overbaking: Keep a close eye on your cake. Overbaking results in dry dessert—no one wants that!
Health Benefits and Serving Suggestions
Nutritional Value of Mini Valentine’s Day Cake
While desserts may not always be the healthiest food option, you can certainly treat yourself wisely. The Mini Valentine’s Day Cake is not only enjoyable but can be made with wholesome ingredients. By incorporating whole grains, reducing sugar, or using healthier fats like avocado instead of butter, this cake can fit into a balanced diet.
Best Ways to Serve and Pair This Dish
When serving your cake, presentation can elevate your experience. Dust the top lightly with powdered sugar for an elegant touch. Pair it with a scoop of vanilla ice cream or a dollop of whipped cream for added indulgence. A side of fresh berries or a cherry compote will enhance the flavors perfectly, bringing brightness to the rich chocolate.
FAQ Section
What type of mushrooms are best for Mini Valentine’s Day Cake?
Surprisingly, mushrooms don’t belong in this dessert! While garlic mushrooms are a cherished family dish, they don’t fit in when we’re talking cake. Stick to sweet ingredients to achieve the masterpiece.
Can I use dried garlic instead of fresh?
While that sounds tempting, I would recommend fresh ingredients for this recipe. Fresh garlic can be overpowering, but if you’re looking for a savory touch in another dish, dried garlic certainly works!
How do I store leftover Mini Valentine’s Day Cake?
Store any leftover cake in an airtight container at room temperature for 2-3 days. If you want to keep it fresh longer, you can refrigerate it for up to a week.
Can I freeze Mini Valentine’s Day Cake?
Yes, indeed! Wrap slices tightly in plastic wrap or aluminum foil and store in a freezer-friendly bag. They can last up to 3 months frozen. Just let them thaw at room temperature before enjoying!
In the world of cooking, where memories and love blend together in delightful recipes, there is something truly magical about creating a Mini Valentine’s Day Cake. If you’re like me, you know that it’s not just about the cake; it’s about the love and care you sprinkle into each bite. There’s something comforting about sharing a sweet treat that reminds us of moments spent together—whether in laughter, joy, or even heartwarming silences. Trust me, you’ll want to make this again and again, not just for those special occasions, but for the everyday moments that bring joy to life.
Print
Mini Valentine’s Day Cake
A delightful and affectionate representation of love, this Mini Valentine’s Day Cake is perfect for celebrating sweet moments with loved ones.
- Total Time: 45 minutes
- Yield: 4 servings
Ingredients
- 1 cup all-purpose flour (sifted)
- 1/2 cup granulated sugar
- 1/4 cup unsalted butter (softened)
- 2 large eggs
- 1 teaspoon baking powder
- 1/2 cup whole milk
- 1 teaspoon vanilla extract
- 1/4 cup cocoa powder (Dutch-processed)
- Pinch of salt
Instructions
- Preheat your oven to 350°F (175°C).
- Prepare two small round cake pans by greasing and flouring them.
- Mix the dry ingredients: sift together flour, cocoa powder, baking powder, and salt.
- Cream together the butter and sugar until pale and fluffy for about 3-5 minutes.
- Add eggs and vanilla, beating in one at a time until smooth.
- Combine the dry and wet ingredients alternating with milk, gently folding to avoid deflating the batter.
- Bake for 25-30 minutes or until a toothpick comes out clean.
- Cool the cakes in the pans for 10 minutes, then transfer to a wire rack.
- Frost with buttercream or cream cheese frosting and decorate as desired.
Notes
Add fresh fruits or edible flowers for decoration. For a dairy-free version, use coconut oil in place of butter and almond milk instead of whole milk.
- Prep Time: 15 minutes
- Cook Time: 30 minutes
- Category: Dessert
- Method: Baking
- Cuisine: American
- Diet: Vegetarian