
The first time I ever laid eyes on a plate of Chocolate Thumbprint Cookies, I was knee-deep in flour and laughter in my grandmother’s cozy kitchen in Asheville, North Carolina. I can still remember the sweet aroma wafting through the air, wrapping around me like a warm hug. My grandmother, a relentless cookie connoisseur, had made it her mission to ensure every holiday was punctuated by cookies, and these thumbprints were her most cherished gem. I marveled at the way the rich chocolate pooled within the indented center, glistening like little chocolate jewels. My small hands worked alongside hers, gently pressing my thumb into the soft dough, eager to leave my mark just like she did.
The simplicity of that moment gave me profound joy. Chocolate Thumbprint Cookies became our little secret—an affirmation of love baked right between glossy chocolate and tender dough. As we shared stories, laughter, and warm cups of cocoa, I felt a sense of belonging, a sprinkle of warmth I craved to carry on. With each bite of that buttery goodness, I tasted more than just chocolate; I tasted memories, love, and a bond that would last a lifetime. Years later, I still make these sweet little treats, sharing them with family and friends and reliving those heartwarming memories with each batch.
Flavor and Popularity
The Unique Flavor Profile of Chocolate Thumbprint Cookies
Chocolate Thumbprint Cookies beautifully blend rich chocolatey goodness with a buttery, melt-in-your-mouth texture. The secret lies in their simplicity—the cookie is typically made from just a handful of ingredients, yet the resulting flavor is nothing short of divine.
The initial experience starts with a soft cookie base, which is often made from butter, sugar, flour, and a hint of vanilla. This combination gives a wonderful buttery backdrop, enhancing the sweetness of the chocolate filling. When you take that first bite, the cookie crumbles softly yet holds its form, contrasting beautifully with the luscious chocolate that nestles in the center.
Moreover, the thrill of experimenting with fillings adds a twist to the traditional recipe. Yes, chocolate is the favored filling, but you can also swap it out for flavored jams or even peanut butter. As the flavors mingle and harmonize, the cookie transports you back to that heartfelt, cozy kitchen where the love baked into each batch truly shines.
Why This Recipe Is a Family Favorite and Crowd-Pleaser
What makes Chocolate Thumbprint Cookies resonate so deeply with families is their ability to evoke nostalgia while remaining universally adored. Who doesn’t love the combination of chocolate and buttery cookies? From birthday parties to holiday gatherings, these delightful bites fit seamlessly into any occasion, making them a timeless classic.
I often joke that there’s a magic spell cast over these cookies, as they seem to vanish within moments of being presented. Children and adults alike can’t resist reaching for just one more! The fun texture, combined with the creamy filling, creates a delightful experience with each bite.
And let’s not forget the creative involvement these cookies inspire! I love inviting my family to join in, letting everyone press their thumb into the dough and customize their centers. Through each batch, we share laughter, mischief, and joy, making memories around the kitchen table that will last far longer than the cookies themselves.
Ingredients and Preparation
Essential Ingredients and Possible Substitutions
To whip up a batch of Chocolate Thumbprint Cookies, you’ll want to gather some essential ingredients:
- All-purpose flour: This forms the bulk of your cookie base, giving it that irresistible texture.
- Unsalted butter: The creamy richness of butter is key for a soft, tender cookie.
- Granulated sugar: This sweetens the dough and contributes to that lovely golden color.
- Brown sugar: For added moisture and a hint of caramel flavor, don’t skip this!
- Eggs: They serve as a binding agent, ensuring all the ingredients come together beautifully.
- Cocoa powder: This is where the chocolate magic begins! Opt for high-quality cocoa for the richest flavor.
- Vanilla extract: A splash of this aromatic essence elevates the overall taste.
- Chocolate filling: You can use chocolate chips or your favorite chocolate spread for that luscious center.
If you have dietary preferences, don’t worry! You can easily swap out a few ingredients. For a gluten-free version, try using gluten-free flour. If you’re vegan, substitute the butter with coconut oil or a vegan butter alternative and use a flaxseed egg instead. For a nutty twist, almond flour can replace some of the all-purpose flour for added depth.
Step-by-Step Recipe Instructions with Tips
Now that you’ve gathered your ingredients, here’s how to bring these delightful cookies to life:
-
Preheat your oven to 350°F (175°C). Line a baking sheet with parchment paper to ensure your cookies won’t stick.
-
Cream the butter and sugars together. Using a mixer, blend together the unsalted butter, granulated sugar, and brown sugar until soft and fluffy.
-
Add the eggs and vanilla. Mix in the eggs, one at a time, followed by the vanilla extract, blending until everything is well incorporated.
-
Combine the dry ingredients. In a separate bowl, whisk together the flour, cocoa powder, and a pinch of salt. Gradually add this mixture to the wet ingredients, mixing just until combined. Be careful not to overmix, as this can lead to tougher cookies.
-
Roll and shape the cookies. Scoop out tablespoons of dough and roll them into balls. Place them on the prepared baking sheet, spacing them about 2 inches apart.
-
Make the thumbprint indentation. With your thumb (or the back of a spoon), gently press down in the center of each cookie to create a small well.
-
Bake for 10-12 minutes or until slightly firm. The edges should look dry but still soft in the center.
-
Add the chocolate filling. Once the cookies are out of the oven, immediately press a piece of chocolate or a dollop of chocolate spread into the center of each thumbprint. Allow the cookies to cool for a few minutes on the baking sheet before transferring them to a wire rack.
-
Enjoy or store. These cookies can be enjoyed warm from the oven or stored in an airtight container for up to a week—if they last that long!
Cooking Techniques and Tips
How to Cook Chocolate Thumbprint Cookies Perfectly
To achieve the perfect batch of Chocolate Thumbprint Cookies, here are a few tips that I’ve found to be essential:
- Room temperature ingredients: Make sure your butter and eggs are at room temperature for better mixing and texture.
- Don’t skip chilling the dough: If your dough feels too sticky, consider refrigerating it for about 30 minutes. Chilling makes it easier to roll into balls and helps the cookies maintain their shape while baking.
- Monitor your bake time closely: Every oven is different. Keep a close eye on your cookies and take them out when they are just set to avoid dryness.
Common Mistakes to Avoid
While making these cookies is relatively simple, a few common pitfalls can occur:
- Overmixing the dough: This can lead to tough cookies. Mix just until combined to keep them tender.
- Skipping the indentation step: The thumbprint isn’t just for show! It’s essential for holding the chocolate that brings these cookies to life.
- Not letting them cool properly: I know the temptation is real to dive in right away, but letting them cool helps them set properly. Patience pays off!
Health Benefits and Serving Suggestions
Nutritional Value of Chocolate Thumbprint Cookies
While Chocolate Thumbprint Cookies are certainly a treat, it’s good to understand their nutritional profile. Typically, one cookie contains a mix of carbohydrates, some protein from eggs, and fats from butter. Dark chocolate is also packed with antioxidants, offering a bit of health benefit in moderation. Although they aren’t a health food, no dessert is complete without a little indulgence!
When serving these cookies, consider pairing them with a glass of milk or a warm cup of coffee. The richness of the chocolate contrasts beautifully with a slightly bitter brew, creating a delightful balance of flavors.
Best Ways to Serve and Pair This Dish
One of my favorite ways to enjoy Chocolate Thumbprint Cookies is to serve them on a beautiful plate at gatherings. They can be arranged alongside other baked goodies for an inviting dessert table.
If you’re feeling adventurous, consider drizzling some melted chocolate over the cookies for an extra touch of decadence. Alternatively, dusting them with powdered sugar after baking can lend an air of elegance that’s perfect for holiday gatherings or dinner parties.
FAQ Section
What type of mushrooms are best for Chocolate Thumbprint Cookies?
While mushrooms aren’t a typical ingredient in Chocolate Thumbprint Cookies, if you’re looking for savory thumbprints, consider using shiitake or portobello for an earthy flavor. Chocolate thumbprints, however, shine best without any mushrooms!
Can I use dried garlic instead of fresh?
Dried garlic isn’t suitable for sweet cookies like Chocolate Thumbprint Cookies. The flavor profile might clash with the sweetness. Stick to classic ingredients to let the chocolate shine.
How do I store leftover Chocolate Thumbprint Cookies?
Store any leftover cookies in an airtight container at room temperature for up to a week. This keeps them soft and fresh. If you want to keep them longer, consider refrigerating them or freezing them for future treats.
Can I freeze Chocolate Thumbprint Cookies?
Absolutely! In fact, these cookies freeze beautifully. Let them cool completely, then layer them between sheets of parchment paper in an airtight container. They can last in the freezer for up to three months, so you always have a sweet treat on hand!
Conclusion
If you’re like me and carry a kernel of nostalgia tucked away for the cherished moments in the kitchen, then Chocolate Thumbprint Cookies are an absolute must-try! These delectable bites don’t just satisfy a sweet tooth; they bring warmth, laughter, and love into your home. Trust me, you’ll want to make this again and again! Each batch carries with it a touch of history and a sprinkle of joy, waiting for you to share it with your loved ones. So grab your apron, bring your family together, and create some sweet memories of your own!
Print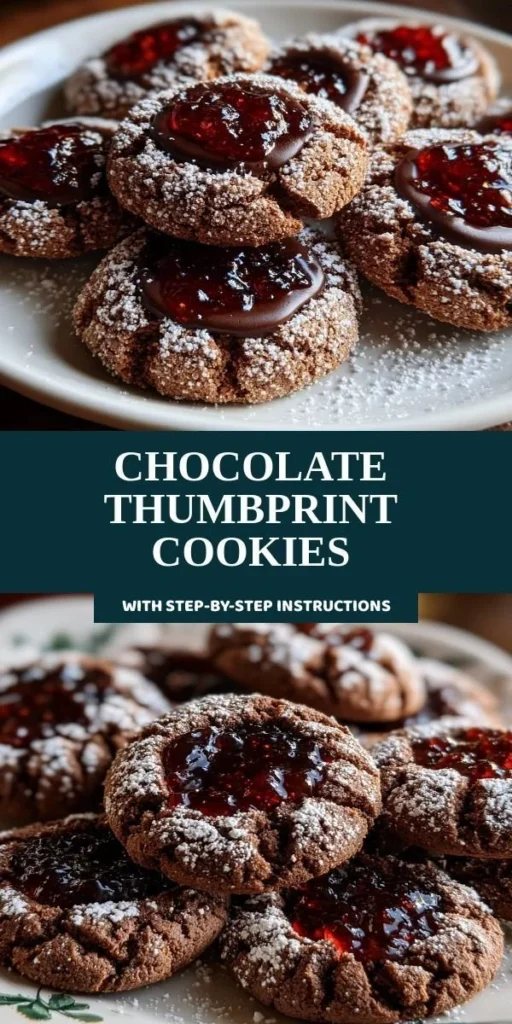
Chocolate Thumbprint Cookies
Deliciously rich chocolate cookies with a buttery texture, featuring a sweet chocolate filling.
- Total Time: 27 minutes
- Yield: 24 cookies
Ingredients
- 2 cups all-purpose flour
- 1/2 cup unsalted butter, softened
- 1/2 cup granulated sugar
- 1/2 cup brown sugar
- 1 large egg
- 1/4 cup cocoa powder
- 1 tsp vanilla extract
- Chocolate chips or chocolate spread for filling
Instructions
- Preheat your oven to 350°F (175°C) and line a baking sheet with parchment paper.
- Cream the butter, granulated sugar, and brown sugar together until soft and fluffy.
- Add the egg and vanilla extract, mixing until well incorporated.
- In a separate bowl, whisk together the flour, cocoa powder, and a pinch of salt. Gradually mix into the wet ingredients until just combined.
- Scoop tablespoons of dough, roll into balls, and place on the baking sheet with 2 inches spacing.
- Press your thumb into the center of each ball to create a small indentation.
- Bake for 10-12 minutes or until the edges are dry but centers remain soft.
- Press a piece of chocolate or a dollop of chocolate spread into the center of each cookie right after baking.
- Let cool for a few minutes before transferring to a wire rack. Enjoy warm or store in an airtight container.
Notes
For gluten-free, substitute with gluten-free flour. For vegan options, use coconut oil and flaxseed eggs.
- Prep Time: 15 minutes
- Cook Time: 12 minutes
- Category: Dessert
- Method: Baking
- Cuisine: American
- Diet: Vegetarian