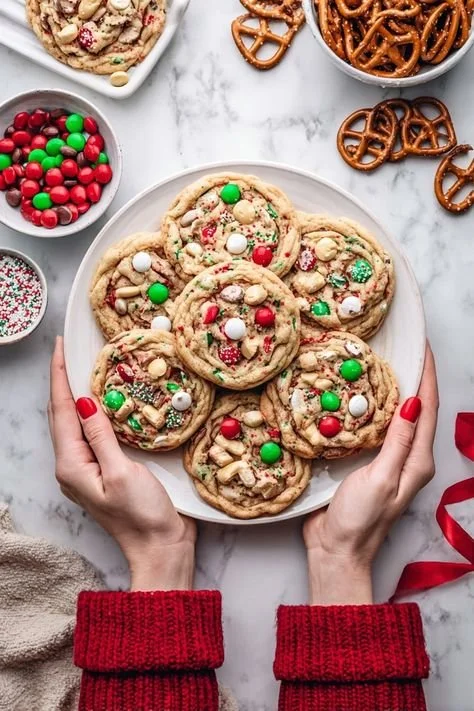
The air was thick with the sweet scent of baking cookies when I first made Christmas Kitchen Sink Cookies. I’ll never forget the joy swelling in my heart as I stood in my grandmother’s cozy kitchen, her aged hands guiding mine as we mixed an array of ingredients. Those cookies were magical – an irresistible mixture of chocolate, nuts, and all the festive bits we could gather, reminding me of the ultimate joy of the holiday season. With every scoop of dough, we tossed in everything but the kitchen sink—thus, the name.
As a child, I often marveled at how food could bring people together, transforming simple moments into cherished memories. Each time I pulled a tray of these cookies from the oven, the warmth of the kitchen wrapped around me like a hug. I watched my family gather around, eyes lighting up as they tasted our joyful creation. It wasn’t just about the flavors, but the laughter and love that infused each cookie.
Today, Christmas Kitchen Sink Cookies are a staple in my home, a holiday tradition that I carry forward remembering those treasured moments with my grandmother. They are more than just cookies; they symbolize love, family, and the festive spirit that makes this season truly special.
Flavor and Popularity
The Unique Flavor Profile of Christmas Kitchen Sink Cookies
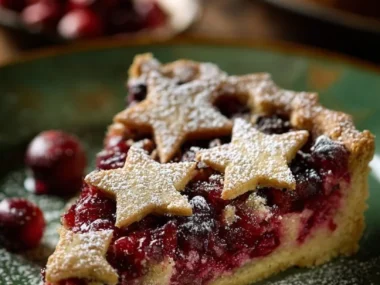
Christmas Kitchen Sink Cookies really do capture the essence of the holidays. With a delightful combination of sweet, salty, and nutty flavors, they form a beautiful harmony that dances on your taste buds. Imagine biting into a chewy cookie—its crispy edges giving way to a gooey center packed with semi-sweet chocolate chips cascading against crunchy walnuts and sweet dried cranberries. The buttery richness of each bite balances perfectly with the hint of cinnamon, evoking the warm spices that pepper our family gatherings.
You can tailor this recipe to your liking. Throw in some white chocolate chunks for a little extra sweetness or a sprinkle of sea salt to enhance the flavors. The beauty of these cookies lies in their adaptability. They embrace whatever flavors you adore or whatever bits and pieces you might have left in your pantry.
Why This Recipe Is a Family Favorite and Crowd-Pleaser
What makes Christmas Kitchen Sink Cookies such a hit is their versatility. Whether you’re in a jam with unexpected guests or planning a holiday gathering, these cookies are the perfect treat. They never fail to elicit smiles and compliments, creating a shared moment of delight. Children and adults alike revel in the excitement of choosing their favorite mix-ins—from crunchy pretzels to creamy peanut butter cups.
The excitement of digging into these cookies goes beyond taste. They are a canvas for creativity, a sweet invitation for family members to join in the fun of the baking. Over the years, I’ve watched my kids experiment with various add-ins, bringing a fresh twist to this cherished tradition. It’s moments like these that make our kitchen a hub of joy and laughter, drawing us closer during the busy holiday season.
Ingredients and Preparation
Essential Ingredients and Possible Substitutions
To whip up a batch of Christmas Kitchen Sink Cookies, gather these essential ingredients:
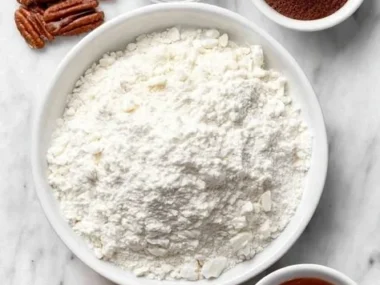
- All-Purpose Flour: The key element for structure, creating those chewy edges while producing a soft center.
- Baking Soda & Baking Powder: These leavening agents ensure your cookies rise beautifully without falling flat.
- Unsalted Butter: Opt for room temperature butter for that rich, buttery flavor that’s almost irresistible.
- Brown Sugar & Granulated Sugar: A mix of sugars adds depth and balances sweetness. Dark brown sugar can enhance the flavor even further.
- Eggs: These bind everything together and contribute to the cookies’ chewy texture.
- Vanilla Extract: You can’t forget this! It introduces warmth and sweetness that is simply heavenly.
- Chocolate Chips: Semi-sweet or dark chocolate brings a lovely melting quality to each bite.
- Mix-ins (nuts, dried fruits, etc.): This is where the magic happens! Feel free to use what you have on hand.
Need substitutions? No problem! Use coconut oil instead of butter for a dairy-free option, or swap out egg for flaxseed meal mixed with water if you’re looking for a vegan alternative. For gluten-free cookies, consider gluten-free all-purpose flour, which works wonders in this recipe.
Step-by-Step Recipe Instructions with Tips
- Preheat your oven to 350°F (175°C) and line baking sheets with parchment paper.
- In a mixing bowl, cream together softened butter, brown sugar, and granulated sugar until it’s light and fluffy.
- Add in eggs one at a time, ensuring they’re fully incorporated before adding the next. Stir in the vanilla extract.
- In a separate bowl, whisk together flour, baking soda, and baking powder. Gradually combine the dry ingredients with the wet mixture—mix until just combined.
- Fold in your chosen chocolate chips, nuts, and any additional mix-ins to create your cookie’s signature flavor.
- Using a tablespoon, drop mounds of cookie dough onto the lined baking sheets, leaving space in between for spreading.
- Bake for 10 to 12 minutes, or until the edges are golden brown. Let them cool slightly on the sheet before transferring them to a wire rack.
Here’s a tip: Keep a close eye on your cookies as they bake! Taking them out too early can lead to a doughy center, while overbaking can result in hard cookies. Aim for a soft, slightly underbaked look, as they will firm up as they cool.
Cooking Techniques and Tips
How to Cook Christmas Kitchen Sink Cookies Perfectly
Baking these cookies is more than just following a recipe; it’s all about creating an environment in your kitchen where warmth and love thrive. Start with high-quality ingredients, as they elevate the flavors of your cookies. Remember to measure accurately—baking is a science, after all! Use a kitchen scale for precision, especially with flour, which can be finicky if measured incorrectly.
The temperature of your butter matters too. Room temperature butter will cream with the sugars magnificently, creating a light and airy batter, while cold butter will yield denser cookies. For that perfect balance of chewy and crispy, don’t shy away from underbaking just a touch. Trust me, your family will thank you!
Common Mistakes to Avoid
One of the biggest mistakes I’ve made over the years is overmixing the dough. Once you incorporate the flour, mix just until combined. The more you mix, the tougher your cookies will turn out. Also, be careful not to overcrowd your baking sheets. Leave space between those cookie mounds to allow for expansion. Finally, use an oven thermometer if you’re unsure about your oven’s true temperature—accurate heat is key for baking success!
Health Benefits and Serving Suggestions
Nutritional Value of Christmas Kitchen Sink Cookies
While these cookies are primarily a festive treat, they do offer some nutritional benefits. Nuts provide healthy fats, protein, and fiber, while dried fruits add natural sweetness along with essential vitamins. If you choose dark chocolate, you get an antioxidant boost too! Moderation is crucial, of course, but these cookies can be a part of your balanced holiday fun.
Best Ways to Serve and Pair This Dish
Serve your cookies warm with a glass of milk or a cup of rich hot cocoa for that classic holiday experience. They also pair beautifully with a scoop of vanilla ice cream, creating an indulgent dessert that everyone will love. If you want to impress your guests, consider stacking cookies on a festive platter adorned with seasonal greens and a sprinkle of powdered sugar.
FAQ Section
What type of mushrooms are best for Christmas Kitchen Sink Cookies?
For this cookie recipe, mushrooms are not typically used, but if you’re looking to experiment with savory baking, try using shiitake or button mushrooms for their mild flavor and meaty texture.
Can I use dried garlic instead of fresh?
If you’re looking to add a savory twist, you can use dried garlic. Just remember that dried versions are more concentrated in flavor, so use them sparingly compared to fresh garlic. However, I suggest sticking with the sweetness of traditional holiday flavors for these cookies!
How do I store leftover Christmas Kitchen Sink Cookies?
Store your cookies in an airtight container at room temperature for up to a week. If you want to keep them longer, place them in the fridge, where they can stay fresh for two weeks.
Can I freeze Christmas Kitchen Sink Cookies?
Absolutely! These cookies freeze beautifully. Just make sure to stack them in layers with parchment paper in between to prevent sticking, then place them in a freezer-safe bag. They can last for about three months in the freezer.
Conclusion
If you’re like me and believe that food can weave the fabric of family bonds, then making Christmas Kitchen Sink Cookies is a must. With their festive flavors and endless possibilities, they become more than just a cookie; they become a heartfelt tradition that brings joy to every gathering. There’s something comforting about gazing at a tray of these cookies and knowing that each one carries with it the spirit of the season. Trust me, you’ll want to make this again and again. Share them with family, friends, or even keep them all to yourself—after all, the joy of baking is best enjoyed shared! So roll up your sleeves, preheat that oven, and let the holiday cheer begin!
Print
Christmas Kitchen Sink Cookies
A delightful blend of chocolate, nuts, and festive treats, these cookies are perfect for holiday gatherings and family traditions.
- Total Time: 27
- Yield: 24 cookies
Ingredients
- 2 1/4 cups All-Purpose Flour
- 1 teaspoon Baking Soda
- 1 teaspoon Baking Powder
- 1 cup Unsalted Butter, room temperature
- 1 cup Brown Sugar
- 1/2 cup Granulated Sugar
- 2 large Eggs
- 1 teaspoon Vanilla Extract
- 1 cup Semi-sweet Chocolate Chips
- 1 cup Walnuts, chopped
- 1 cup Dried Cranberries
Instructions
- Preheat your oven to 350°F (175°C) and line baking sheets with parchment paper.
- Cream together softened butter, brown sugar, and granulated sugar until light and fluffy.
- Add eggs one at a time, ensuring they are fully incorporated before adding the next. Stir in the vanilla extract.
- In a separate bowl, whisk together flour, baking soda, and baking powder. Gradually combine the dry ingredients with the wet mixture until just combined.
- Fold in chocolate chips, walnuts, and cranberries.
- Drop mounds of cookie dough onto the lined baking sheets, leaving space in between for spreading.
- Bake for 10 to 12 minutes, or until the edges are golden brown. Cool slightly before transferring to a wire rack.
Notes
For a dairy-free option, substitute coconut oil for butter. For gluten-free, use gluten-free all-purpose flour.
- Prep Time: 15
- Cook Time: 12
- Category: Dessert
- Method: Baking
- Cuisine: American
- Diet: Vegetarian