Cherry Pistachio Cheesecake holds a charm that takes me back to sun-soaked afternoons spent in my grandmother’s vibrant kitchen. I remember the first time I tasted this delightful dessert. It was a warm summer day, and the sweet scent of cherries lingered in the air, weaving through the sounds of laughter and the clinking of silverware. My grandmother stood gracefully at the counter, her hands dusted with flour, as she expertly whipped a creamy cheesecake batter adorned with bits of pistachio. The cherry topping glistened like rubies, teasing us from its glass bowl. I can still hear her voice, inviting us to be patient while it set in the refrigerator.
Those moments weren’t just about baking; they were about connecting with family, carrying on traditions, and finding joy in the simplest processes of life. The first bite of that Cherry Pistachio Cheesecake was like tasting love itself — smooth, rich, and velvety with a delightful crunch from the nuts — and I knew it would become a treasured recipe in my heart. Every time I whip up this cheesecake, it feels like I’m sharing a piece of my childhood, and I can’t help but smile at the thought of creating those same precious memories for my loved ones today.
Flavor and Popularity
The Unique Flavor Profile of Cherry Pistachio Cheesecake
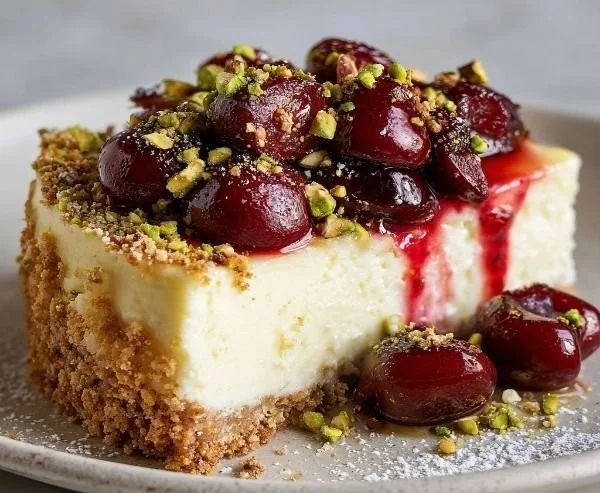
Cherry Pistachio Cheesecake is a truly special treat that brings together two unlikely partners: sweet cherries and earthy pistachios. The luscious cream cheese base offers a rich, smooth texture that sets the stage for this vibrant flavor combination. The tartness of the cherry topping contrasts beautifully with the buttery crunch of pistachios, delivering a multi-dimensional taste experience that dances on your palate. It’s not just a dessert; it’s a celebration in every slice! With its dreamy hues of pink and green, this cheesecake isn’t just tempting; it’s a feast for the eyes as well.
What truly sets this cheesecake apart is its ability to capture the essence of each bite. The cherries are often infused with a hint of lemon or vanilla, enhancing their sweetness and making the flavors even more pronounced. Meanwhile, the pistachios lend a unique earthiness and slight saltiness, balancing the dish perfectly. Each forkful feels indulgent yet refreshing, encapsulating the joys of summer all year round.
Why This Recipe Is a Family Favorite and Crowd-Pleaser
Whenever I serve Cherry Pistachio Cheesecake, it feels like I’m threading a tapestry of family memories. This recipe crossed generations, embodying the essence of tradition and new beginnings. It’s a dessert that sparks joy not just through its delightful flavors but through the stories it brings to the table. When my family gathers for celebrations, it’s often this cheesecake that crowns the occasion, transforming a meal into a cherished memory.
What’s more, this recipe is incredibly versatile — perfect for birthdays, holidays, or simply a dessert to brighten a friend’s day. The vibrant colors and textures appeal to everyone from little ones to the wisdom of our elders. It’s become a staple because, let’s face it, who can resist the allure of a creamy cheesecake topped with vibrant cherries and sprinkled with crunchy pistachios? Sharing this dessert often leads to joyful conversations and accolades that fill our hearts and home with warmth.
Ingredients and Preparation
Essential Ingredients and Possible Substitutions
To create the perfect Cherry Pistachio Cheesecake, gather the following essential ingredients:
- Cream cheese: The creamy base that gives cheesecake its signature texture. Try using full-fat for the best results.
- Granulated sugar: Sweetens the cheesecake filling to balance the tart cherries.
- Eggs: These create structure and richness. Consider using room temperature eggs for an even blend.
- Heavy cream: It adds an indulgent richness that’s hard to resist.
- Fresh cherries: The star of the show! Opt for ripe ones for the best flavor or use frozen if they’re out of season.
- Pistachios: These lend a delightful crunch and nutty flavor. Feel free to use roasted and salted for an added kick.
- Vanilla extract: Enhances all the flavors with its sweet warmth.
- Lemon juice: Brightens the dish and balances the sweetness.
If you need substitutions, don’t worry! You can use Neufchâtel cheese for a lighter option instead of cream cheese, or swap granulated sugar with a sweetener of your choice to fit dietary needs. And for those who might want to avoid eggs, you can replace each egg with half a ripe mashed banana or 1/4 cup of unsweetened applesauce. The versatility of this recipe makes it incredibly forgiving, allowing creativity to thrive.
Step-by-Step Recipe Instructions with Tips
-
Prepare the crust: Start by preheating your oven to 325°F (160°C). Crush 1 ½ cups of pistachios (or graham crackers if you prefer) into fine crumbs and mix in ½ cup of melted butter until combined. Press this mixture firmly into the bottom of a springform pan. Bake for 10 minutes and set aside to cool.
-
Create the cheesecake batter: In a mixing bowl, blend 24 ounces of softened cream cheese and 1 cup of granulated sugar until smooth. Add 3 eggs, one at a time, mixing well after each. Toss in 1 teaspoon of vanilla extract and squeeze in the juice of half a lemon. Mix until just combined.
-
Add heavy cream: Gently fold in 1 cup of heavy cream, stirring until the mixture is smooth and airy.
-
Bake the cheesecake: Pour this luscious batter over your cooled crust and smooth the top. Bake in a water bath for about 50-60 minutes or until the edges appear set but the center remains slightly jiggly. Turn off the oven and crack the door, allowing the cheesecake to cool gradually. After 30 minutes, move it to the fridge for at least 4 hours, preferably overnight.
-
Prepare the cherry topping: While the cheesecake is cooling, create a luscious cherry topping. Combine 2 cups of pitted cherries, ½ cup of granulated sugar, and a squeeze of lemon juice in a saucepan over medium heat. Cook until the cherries soften and the sugar dissolves, producing a syrupy texture. Allow to cool before spreading it on the cheesecake.
-
Garnish with pistachios: Just before serving, sprinkle extra chopped pistachios on top for that lovely crunch.
-
Serve: Slice, serve, and watch as smiles bloom around the table!
Cooking Techniques and Tips
How to Cook Cherry Pistachio Cheesecake Perfectly
The secret to a perfect Cherry Pistachio Cheesecake lies in how you treat the ingredients and the baking process. Be gentle with your mixtures to preserve the fluffiness and avoid overmixing, which can lead to cracks. The water bath during baking helps regulate temperature and keeps the cheesecake moist. Keep an eye on it during the last few minutes to ensure it firms up without overbaking.
Once cooled, allow it ample time in the refrigerator; this is where the flavors meld beautifully, creating a cohesive bite from the cheesecake and the cherry topping. It’s tempting, but the wait truly pays off!
Common Mistakes to Avoid
One common mistake to avoid is not using room temperature ingredients. Cold cream cheese can lead to a lumpy cheesecake, while eggs that are too cold won’t blend well. Also, resist the urge to skip the water bath debate; it makes a world of difference. Lastly, make sure to cool the cheesecake in the oven gradually rather than pulling it out immediately, as this preserves its creaminess and helps prevent cracks.
Health Benefits and Serving Suggestions
Nutritional Value of Cherry Pistachio Cheesecake
While Cherry Pistachio Cheesecake is an indulgent treat, it does carry nutritional benefits hidden amongst its deliciousness. Cherries are packed with antioxidants and can aid in reducing inflammation. Pistachios offer healthy fats and can contribute positively to heart health. Paired with the calcium and protein boost from cream cheese and heavy cream, this is a dessert that satisfies cravings while providing some beneficial nutrients.
Best Ways to Serve and Pair This Dish
Cherry Pistachio Cheesecake is a fantastic end to a compelling meal or an exquisite way to treat guests. I love serving it with freshly whipped cream on the side for that extra indulgence. A sprig of mint offers a refreshing contrast and brightens its presentation beautifully. Pair it with a well-rounded dessert wine or a cup of rich coffee to elevate the dining experience.
You can also complement it with a light salad or a fruit platter to balance the richness of the cheesecake. I’ve even made it a little more festive by garnishing with dark chocolate shavings or a sprinkle of edible gold — not only does it look stunning, but it adds a touch of luxury!
FAQ Section
What type of mushrooms are best for Cherry Pistachio Cheesecake?
Mushrooms aren’t typically involved in Cherry Pistachio Cheesecake. Ensure you stick to the star ingredients—cherries and pistachios—if you want to maintain the integrity of this delightful dessert.
Can I use dried garlic instead of fresh?
As lovely as garlic can be in savory dishes, it has no place here! Stick with the sweet flavors of cherries and the nutty essence of pistachios to keep the cheesecake delightful.
How do I store leftover Cherry Pistachio Cheesecake?
To maintain its freshness, keep leftover cheesecake covered in the refrigerator for up to 5 days. Just ensure it’s properly sealed to prevent dryness or absorbing other odors.
Can I freeze Cherry Pistachio Cheesecake?
Absolutely! To freeze, wrap slices in plastic wrap followed by aluminum foil. It should last for about 2-3 months in the freezer. Just remember to thaw it overnight in the refrigerator before serving!
Conclusion
If you’re like me and have a soft spot for desserts that weave together cherished memories and heartwarming flavors, I urge you to give this Cherry Pistachio Cheesecake a try. There’s something comforting about the way this dessert blends sweetness with a hint of nostalgia. The process itself feels as special as the end result, creating an experience you can share with those you hold dear. Trust me, you’ll want to make this again and again, sharing not just a slice of cheesecake, but also a slice of love itself.
Print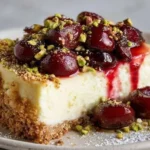
Cherry Pistachio Cheesecake
A creamy cheesecake topped with vibrant cherries and crunchy pistachios, perfect for creating cherished memories.
- Total Time: 255 minutes
- Yield: 12 servings
Ingredients
- 24 ounces cream cheese, softened
- 1 cup granulated sugar
- 3 large eggs
- 1 teaspoon vanilla extract
- 1/2 lemon, juiced
- 1 cup heavy cream
- 1 1/2 cups pistachios, crushed (or graham crackers)
- 1/2 cup melted butter
- 2 cups fresh cherries, pitted
- 1/2 cup granulated sugar (for cherry topping)
- 1/2 lemon, juiced (for cherry topping)
Instructions
- Preheat your oven to 325°F (160°C).
- Mix crushed pistachios with melted butter and press into the bottom of a springform pan.
- Bake the crust for 10 minutes, then let it cool.
- In a mixing bowl, blend cream cheese and sugar until smooth. Add eggs one at a time, mixing well after each addition. Stir in vanilla and lemon juice.
- Fold in heavy cream until smooth.
- Pour the batter over the cooled crust and bake in a water bath for 50-60 minutes until edges are set.
- Cool gradually in the oven with the door cracked for 30 minutes, then refrigerate for at least 4 hours.
- In a saucepan, combine cherries, sugar, and lemon juice. Cook until softened and syrupy, then cool.
- Spread the cherry topping over the cheesecake and sprinkle with chopped pistachios before serving.
- Slice, serve and enjoy!
Notes
Ensure all ingredients are at room temperature for the best results. Be gentle with mixing and utilize a water bath to prevent cracks.
- Prep Time: 15 minutes
- Cook Time: 70 minutes
- Category: Dessert
- Method: Baking
- Cuisine: American
- Diet: Vegetarian