There’s a warmth that fills my heart when I think back to the afternoon I first baked Red Velvet Brownies. It was a chilly spring day in Asheville, the kind of day where the sun breaks through the clouds, but the air still whispers of winter. I can still hear the laughter of my granddaughter, Ellie, as she helped me stir the batter. We were getting ready to celebrate her birthday—her eyes sparkled with anticipation, knowing that our culinary adventures would involve something special.
The moment I poured in the rich, red cocoa, a sweet and deep aroma filled the kitchen, mingling with the notes of butter and sugar that danced through the air. I remember Ellie asking a million questions—”Why does it have to be red, Grandma?”—and my response was straightforward yet filled with love: “It’s a way of adding joy to our treats.” This simple act of making Red Velvet Brownies became a cherished tradition between us, a memory that I hold close and always reflect upon when preparing this delightful dessert.
As we shared those brownies a little later, the luscious, fudgy squares melted in our mouths, and I saw the delight on Ellie’s face. It’s funny how a simple recipe can evoke such happiness. Each bite was a blend of nostalgia and joy, the perfect mix that only a loving kitchen can provide. So let me share this recipe with you and help you create your own sweet memories.
Table of Contents
Flavor and Popularity
The Unique Flavor Profile of Red Velvet Brownies
Red Velvet Brownies boast a unique combination of flavors that set them apart from traditional brownies. The tangy touch of buttermilk and the rich hints of cocoa create a decadent base. It’s a play between sweetness and a hint of earthiness—a creamy mouthfeel enriched with butter that melts on your tongue. The beautiful red hue not only gives these brownies their signature look but also adds a certain allure that makes them perfect for celebrations or even a cozy evening at home.
The addition of cream cheese frosting, while optional, elevates the flavor even further. Just picture that rich creaminess contrasting beautifully with the moist, fudgy brownie base. Each bite becomes a thrilling adventure for the taste buds, enveloping you in a delightful dance of flavors. And let’s not forget the visual appeal—a tray of these lovely Red Velvet Brownies is sure to catch the eye and spark conversations. They’re perfect for gatherings, potlucks, or just to satisfy a craving for something truly special.
Why This Recipe Is a Family Favorite and Crowd-Pleaser
There’s something magical about desserts that brings family and friends together. Red Velvet Brownies have a unique ability to not just satisfy your sweet tooth but also to create unforgettable memories. They are a red carpet moment for dessert lovers, evoking smiles and laughter with every bite.
In our family, these brownies quickly became a staple. They serve as the showstopper at birthday parties and holiday celebrations. Whenever we have a gathering, you can bet that someone will ask if I’ve made my Red Velvet Brownies. Their vibrant color and rich flavor allure everyone, even those who usually shy away from desserts. It’s a dessert that feels special—not just because of its unique flavor but also due to the love and thought you put into it. Baking these brownies has become a tradition, a way to bond over shared experiences, and a reminder that food has a unique ability to bring joy into our lives.
Ingredients and Preparation
Essential Ingredients and Possible Substitutions
To make delightful Red Velvet Brownies, you’ll want to gather a few essential ingredients. Here’s what you’ll need:
- Unsweetened cocoa powder: This is the foundation for that rich chocolate flavor that complements the sweetness.
- All-purpose flour: It gives structure to the brownies.
- Granulated sugar: Sweetness is key! Use less or more to suit your taste.
- Butter: Melted for moistness and flavor. You could also use coconut oil for a dairy-free version.
- Eggs: They provide richness and help bind the ingredients together.
- Buttermilk: Adds the signature tang and contributes to the moist texture.
- Vanilla extract: Enhances all the other flavors in the mix.
- Red food coloring: Just enough to create that iconic hue.
- Cream cheese: For a luscious frosting, add powdered sugar and vanilla to taste.
If you need substitutions, don’t worry! Instead of granulated sugar, you can use brown sugar for a deeper flavor and moisture. Coconut yogurt is a great alternative to buttermilk if you’re looking for a dairy-free version. And if you want to avoid food coloring, consider using a little beet juice for the natural red hue. The brownies may not have the exact same appearance, but they’ll still taste divine.

Step-by-Step Recipe Instructions with Tips
Prepare the Oven and Pan: Preheat your oven to 350°F (175°C) and grease an 8×8 inch baking pan or line it with parchment paper for easy removal.
Mix the Dry Ingredients: In a medium bowl, whisk together the cocoa powder, flour, and powdered sugar. This helps aerate the mixture for fudgier brownies. Don’t forget a pinch of salt, which balances out the flavors beautifully.
Combine the Wet Ingredients: In a separate bowl, melt your butter and let it cool slightly. Add the eggs, buttermilk, vanilla extract, and red food coloring. Whisk them together until smooth.
Blend Wet and Dry: Gently fold the wet mixture into the dry ingredients until just combined. This gentle mixing helps to maintain that dense, fudgy texture we love.
Bake and Cool: Pour the batter into your prepared pan and spread evenly. Bake for about 25-30 minutes or until a toothpick inserted comes out with moist crumbs but not wet batter. Allow brownies to cool completely in the pan before frosting.
Prepare the Cream Cheese Frosting (optional): Beat together softened cream cheese, powdered sugar, and vanilla extract until smooth. Spread generously over the cooled brownies.
Serve and Enjoy: Slice into squares and watch these luscious brownies disappear!
Baking Tip: Make sure not to overmix your batter. By doing so, you can maintain that desired fudgy consistency that makes these brownies melt in your mouth.
Cooking Techniques and Tips
How to Cook Red Velvet Brownies Perfectly
To achieve the ultimate Red Velvet Brownies, temperature control is key. Make sure your ingredients are at room temperature before mixing; this helps them combine more smoothly. Additionally, keep an eye on your brownies towards the end of the baking time. I often find that they finish cooking even when my timer chimes.
Use the toothpick method for testing doneness. A few moist crumbs sticking to the toothpick mean that your brownies are just right—a sign that they will be fudgy rather than dry.
And always let your brownies cool completely before cutting. This allows them to set and those glorious edges to form while keeping the center gooey. Trust me on this; patience will reward you with a blissfully satisfying experience.
Common Mistakes to Avoid
One of the most common mistakes is overmixing the batter. You want to mix just until the ingredients are combined. Overmixing activates gluten, which can lead to tough, chewy brownies. Embrace that carefree spirit of baking—your brownies will thank you!
Another mistake is not measuring your ingredients properly. I often set out all my ingredients before I start, ensuring I have everything I need and that I measure accurately. This is critical in baking!
Lastly, don’t forget to check on your brownies halfway through the baking time. Every oven is different, and it’s essential to ensure your brownies cook evenly without drying out.

Health Benefits and Serving Suggestions
Nutritional Value of Red Velvet Brownies
Let’s be real—Red Velvet Brownies are a treat, but they do have some benefits depending on the ingredients you use. Unsweetened cocoa powder contains antioxidants, which are great for your body. The eggs provide protein, and buttermilk can even contribute calcium to your diet.
If you’re looking for ways to lighten your indulgence while preserving flavor, consider substituting some all-purpose flour with almond flour for a nutty twist. You might be surprised by how satisfying they can be without heavy butter or sugar.
Best Ways to Serve and Pair This Dish
These brownies shine when paired with a scoop of vanilla ice cream or dollops of whipped cream—pure bliss! Drizzle some chocolate or raspberry sauce on top for flair. You can even sprinkle a bit of sea salt over the frosting for a delightful balance of sweet and salty.
They also make a beautiful centerpiece for gatherings. Serve them on a delicate platter with fresh berries for a pop of color and a touch of elegance. Not to mention, they pair fabulously with a cup of coffee—there’s something about the rich flavors of the brownies matching the bold notes of a dark roast that feels exquisite.
FAQ Section
What type of mushrooms are best for Red Velvet Brownies?
When it comes to Red Velvet Brownies, mushrooms aren’t a typical ingredient. They’re more suited for savory dishes. Stick to the classic sweet combination of chocolate and buttermilk for the best results.
Can I use dried garlic instead of fresh?
Dried garlic is best reserved for savory recipes, not sweet treats like Red Velvet Brownies. You might mislead some flavor; instead, embrace the sweetness and rich mixture of flavors in the brownie without any garlic.
How do I store leftover Red Velvet Brownies?
Store your leftovers in an airtight container at room temperature for up to three days. If you’re looking to extend their life, you can keep them in the refrigerator for a week, although they won’t stay as fudgy.
Can I freeze Red Velvet Brownies?
Absolutely! Cut them into squares, place them in a single layer on a baking sheet to freeze first, then transfer them to a freezer-safe container. They’ll maintain their quality for up to three months. Just remember to thaw them in the fridge overnight before enjoying!
Conclusion
If you’re like me, baking isn’t just about the ingredients. It’s about creating memories, sharing laughter, and loving the time spent in the kitchen. As you embark on this journey to create your own batch of Red Velvet Brownies, remember that the joy of baking comes from the heart. We’re not just whipping up a dessert; we’re crafting little moments of happiness, one fudgy square at a time. Trust me—you’ll want to make this again and again!
Now, gather your ingredients and let’s add some joy to that kitchen of yours!
Print
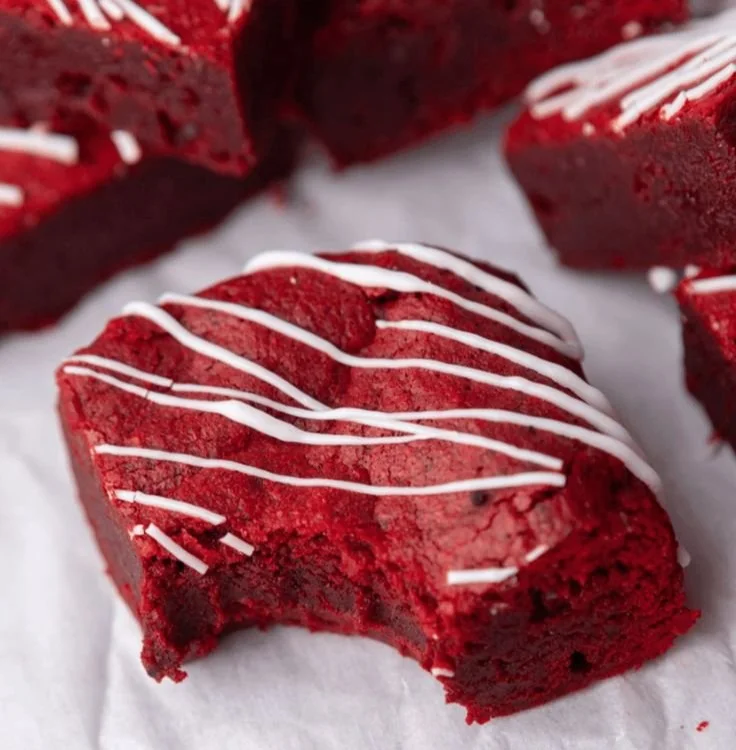
Red Velvet Brownies
Decadent and fudgy Red Velvet Brownies, perfect for celebrations or cozy evenings at home.
- Total Time: 45 minutes
- Yield: 16 servings
Ingredients
- 1 cup unsweetened cocoa powder
- 1 cup all-purpose flour
- 1 1/2 cups granulated sugar
- 1/2 cup butter, melted
- 2 large eggs
- 1/2 cup buttermilk
- 1 teaspoon vanilla extract
- 1 tablespoon red food coloring
- 1 cup cream cheese (optional for frosting)
- 1/2 cup powdered sugar (optional for frosting)
Instructions
- Preheat the oven to 350°F (175°C) and grease an 8×8 inch baking pan or line it with parchment paper.
- In a medium bowl, whisk together the cocoa powder, flour, powdered sugar, and a pinch of salt.
- In a separate bowl, melt the butter and let it cool slightly. Then add the eggs, buttermilk, vanilla extract, and red food coloring; whisk until smooth.
- Gently fold the wet mixture into the dry ingredients until just combined.
- Pour the batter into the prepared pan and spread evenly. Bake for about 25-30 minutes until a toothpick inserted comes out with moist crumbs.
- Allow brownies to cool completely before applying frosting (if using).
- For frosting, beat together softened cream cheese, powdered sugar, and vanilla until smooth, then spread over the brownies.
- Slice into squares and serve.
Notes
Avoid overmixing the batter for desired fudgy consistency. Use room temperature ingredients for better mixing.
- Prep Time: 15 minutes
- Cook Time: 30 minutes
- Category: Dessert
- Method: Baking
- Cuisine: American
- Diet: Vegetarian