A Touch of Comfort: The Ghost Cookie Cake Recipe
The first time I made a Ghost Cookie Cake, I still remember the joy radiating from the faces of my family as they pulled slices from the cake, their laughter dancing through my cozy kitchen. I had stumbled upon the Ghost Cookie Cake Recipe in a dusty old cookbook that once belonged to my grandmother—its pages yellowed and slightly crumbling. With the Southern charm infusing my kitchen, I felt her presence beside me, guiding my hands as I mixed together the buttery goodness and the sweet, ghostly vanilla flavors. That day transformed an ordinary afternoon into something special, igniting a warmth within me that only a beloved family recipe can spark. This cake is more than just dessert; it’s a tradition that binds us together with love, laughter, and the sweet scent of nostalgia.
Table of Contents
Flavor and Popularity
The Unique Flavor Profile of Ghost Cookie Cake Recipe
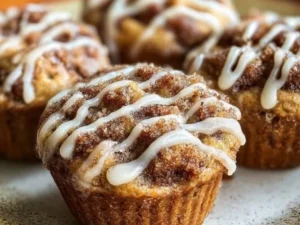
When it comes to the Ghost Cookie Cake Recipe, the flavor profile stands out as a dreamy blend of buttery richness and subtly sweet notes that make every bite a pure delight. The cake’s moist texture, combined with hints of vanilla and hints of chocolate, creates an enticing combination that tickles your taste buds. Adding in ingredients like toasted nuts or even a hint of almond extract can elevate the taste to a whole new level, enriching the cake with warmth and depth.
It’s amazing how a seemingly simple recipe can transport you back to childhood memories. Whether it’s the fluffy layers of cake or the pleasant crunch of cookie bits within, each bite evokes memories of family gatherings and celebrations. This recipe isn’t just food; it’s comfort on a plate and a reminder of the connections we value in life.
Why This Recipe Is a Family Favorite and Crowd-Pleaser
In our family, any gathering isn’t complete without the Ghost Cookie Cake on the table. It’s the kind of dessert that sparks conversations and brings smiles all around. I often joke that there’s a “ghost” in the recipe because it vanishes so quickly once the family digs in! This cake has a special knack for bringing people together; its simplicity is what makes it a crowd-pleaser. You can serve it at birthday parties, holiday dinners, or even just a cozy Sunday afternoon with a cup of coffee.
Everyone seems to have their own take on how to enjoy it, from creamy ice cream on top to fresh berries that add a hint of brightness to each slice. Sharing this cake with others isn’t just about satisfying hunger; it’s about creating moments of joy and happiness that linger long after the last bite has been taken.
Ingredients and Preparation
Essential Ingredients and Possible Substitutions
To make the Ghost Cookie Cake Recipe truly yours, check out the essential ingredients and some convenient substitutions. Here’s what you’ll need:
- All-purpose flour: This is your base, providing structure. You can swap with gluten-free flour for a gluten-free version.
- Granulated sugar and brown sugar: For the right balance of sweetness. Coconut sugar can work too if you’d like to experiment.
- Butter: A stick of butter lends richness and moisture to the cake. Coconut oil can be a good alternative for a dairy-free option.
- Eggs: They provide binding and moisture. Flax eggs are a great vegan substitute.
- Baking powder: It’s key for the rising action.
- Vanilla extract: Essential for flavor. Use the real stuff for a more aromatic experience.
- Chocolate chips: They add that delightful pop of flavor. Consider dark chocolate or even white chocolate for variety.
- Cookie crumbles: The traditional topping, which could be any store-bought or homemade cookies you love.
Gathering these ingredients creates a promise of what’s to come—a cake filled with heart and warmth.

Step-by-Step Recipe Instructions with Tips
Preheat your oven: Set it to 350°F (175°C). Arrange the baking rack in the center. It’s crucial to ensure even baking.
Prepare your pans: Grease and flour two 9-inch round cake pans. Alternatively, line them with parchment paper for easy removal.
Cream the butter and sugars: In a mixing bowl, use a hand mixer to beat together your softened butter, granulated sugar, and brown sugar until light and fluffy. This process typically takes about 3-4 minutes. It’s the key to achieving that airy texture.
Add the eggs: Mix in eggs one at a time, ensuring they are fully incorporated. Follow with the vanilla extract.
Mix dry ingredients separately: In another bowl, whisk together flour, baking powder, and a pinch of salt. Gradually add this mix to the creamed butter mixture, alternating with the milk for a smoother consistency.
Fold in chocolate chips and cookie crumbles: Gently fold these tasty add-ins into your batter using a rubber spatula. This step enhances the delightful flavor of the cake.
Pour into pans: Divide the batter evenly between the prepared cake pans. You deserve all the creativity and fun, so feel free to swirl the batter with a spoon for aesthetic flair.
Bake: Place the pans in the oven and bake for 25-30 minutes. You can use a toothpick to check for doneness—the toothpick should come out clean.
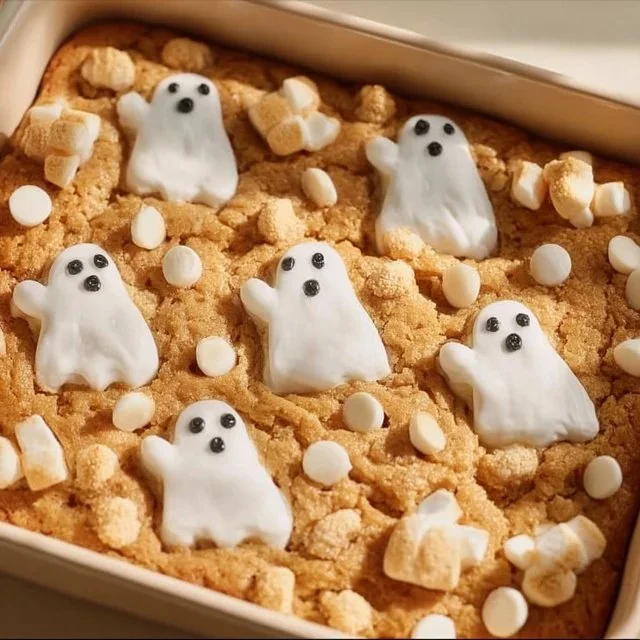
Cool and frost: Allow the cakes to cool for about 10 minutes in the pans, then transfer them to a wire rack. Frost with your favorite icing—cream cheese or even a buttercream suits this cake fantastically. Finish with a sprinkle of cookie crumbles on top for that signature ghostly appearance!
Remember to take your time, and don’t rush the cooling process to ensure the best texture. Trust me; a little patience goes a long way.
Cooking Techniques and Tips
How to Cook Ghost Cookie Cake Recipe Perfectly
For the best results, preheat your oven thoroughly to avoid uneven baking. Monitoring the time is critical; every oven behaves differently. If you notice the tops browning too quickly, you can cover them loosely with aluminum foil. Once baked, allow the cakes to cool completely before frosting, as a warm cake may result in melty frosting. When layering, use a serrated knife to level the tops if needed, ensuring even layers.
Common Mistakes to Avoid
One common mistake is not properly measuring your flour. For the fluffiest cake, spoon it into your measuring cup and level it off, avoiding packing it down. Another pitfall is overmixing the batter, leading to a dense texture instead of a light, fluffy cake. Lastly, I recommend not skipping the cooling step—frosting a warm cake is one of the biggest no-nos for a beautifully presented dessert.

Health Benefits and Serving Suggestions
Nutritional Value of Ghost Cookie Cake Recipe
While this cake is certainly a treat, you can still enjoy it mindfully. The ingredients balance carbohydrates, fats, and proteins, making it a satisfying dessert. Each slice can evoke feelings of nostalgia without excessive guilt, especially when shared among loved ones. Just remember, moderation is key for indulging in this sweet delight.
Best Ways to Serve and Pair This Dish
Serving suggestions abound for the Ghost Cookie Cake Recipe. This dessert pairs beautifully with a scoop of vanilla ice cream or a dollop of whipped cream, transforming a simple slice into an elegant dessert. You might add a side of fresh berries for tartness that cuts through the sweetness, creating an exciting contrast. For a twist, dust the top with powdered sugar for a spooky finish that enhances its ghostly appearance!
FAQ Section
What type of mushrooms are best for Ghost Cookie Cake Recipe?
While this cake doesn’t include mushrooms, it’s named for its light, ethereal qualities reminiscent of soft textures. Yet, if you’re interested in savory versions incorporating mushrooms, opt for shiitake or cremini—they add depth and umami to dishes!
Can I use dried garlic instead of fresh?
Absolutely! However, for the best flavor, it’s preferable to use fresh garlic for a vibrant outcome. If using dried garlic, keep in mind that it tends to be more concentrated, so adjust the quantity accordingly.
How do I store leftover Ghost Cookie Cake Recipe?
Store any leftovers in an airtight container at room temperature for 2-3 days. For longer freshness, consider refrigerating it, although that could alter the cake’s texture.
Can I freeze Ghost Cookie Cake Recipe?
Yes! You can freeze slices of the cake for up to three months. Just ensure to wrap them tightly in plastic wrap followed by aluminum foil to prevent freezer burn. When ready to enjoy, simply thaw it in the fridge overnight.
As I share my Ghost Cookie Cake Recipe with you, I hope you feel inspired to create it in your own kitchen. If you’re like me, you understand that the heart of cooking lies in sharing those special moments with family and friends. There’s something comforting about the warmth that fills the kitchen as you bake this lovely cake. Trust me, you’ll want to make this again and again, and each slice will surely bring a smile to your loved ones’ faces. So tie on that apron, gather your ingredients, and let’s create some joyful memories together!
Print
Ghost Cookie Cake
A delightful cake combining buttery richness with sweet vanilla and cookie bits, perfect for family gatherings.
- Total Time: 45 minutes
- Yield: 12 servings
Ingredients
- 2 cups all-purpose flour (or gluten-free flour)
- 1 cup granulated sugar
- 1/2 cup brown sugar
- 1 cup butter (or coconut oil)
- 3 large eggs (or flax eggs)
- 2 tsp baking powder
- 2 tsp vanilla extract
- 1 cup chocolate chips (dark or white chocolate)
- 1 cup cookie crumbles (store-bought or homemade)
Instructions
- Preheat your oven to 350°F (175°C) and arrange the baking rack in the center.
- Grease and flour (or line with parchment paper) two 9-inch round cake pans.
- In a mixing bowl, cream together the butter, granulated sugar, and brown sugar until light and fluffy (about 3-4 minutes).
- Add the eggs one at a time, then mix in the vanilla extract.
- In another bowl, whisk together the flour, baking powder, and a pinch of salt. Gradually add this to the creamed mixture, alternating with milk for a smoother consistency.
- Fold in chocolate chips and cookie crumbles gently.
- Divide the batter evenly between the prepared pans, swirling it for aesthetic flair.
- Bake for 25-30 minutes or until a toothpick comes out clean.
- Cool the cakes for 10 minutes in the pans before transferring to a wire rack. Frost as desired and add cookie crumbles on top.
Notes
For best results, allow the cakes to cool completely before frosting. Consider using a serrated knife to level the tops if necessary.
- Prep Time: 15 minutes
- Cook Time: 30 minutes
- Category: Dessert
- Method: Baking
- Cuisine: American
- Diet: Vegetarian